How To Replace Whirlpool Fridge Filter Housing WPW10394053
Steven E / Wednesday June 18, 2025
Is your Whirlpool refrigerator leaking or not dispensing water correctly? It could be a faulty water filter housing, but don’t worry—fixing it is simpler than you think! Dive into our step-by-step guide and accompanying how-to video, and get your fridge back in perfect working order.
Looking for the right part? Enter your appliance model number below to find the exact match and get your appliance running like new again!
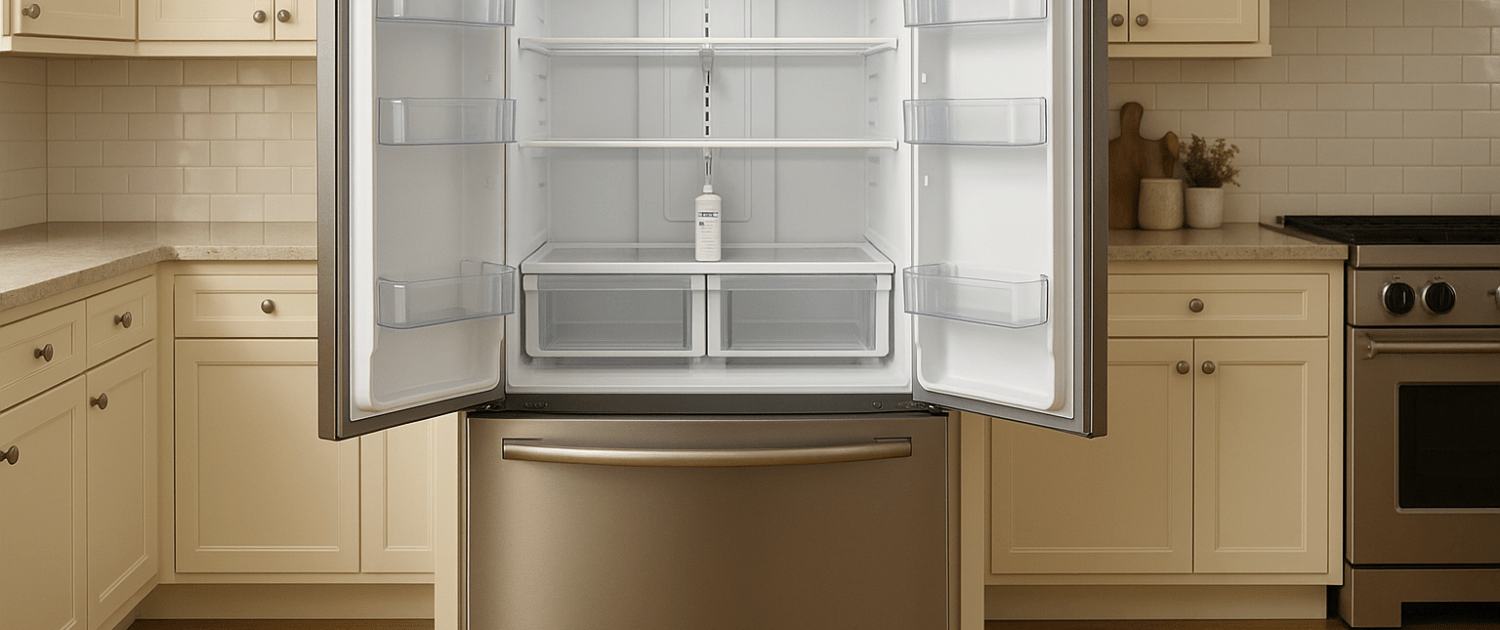
If your Whirlpool refrigerator is leaking near the water filter or not dispensing water properly, the water filter housing might be the issue. This part, WPW10394053, holds the water filter in place and helps manage the flow of water. Over time, it can crack or wear out, causing leaks. The good news is that replacing it is a manageable DIY job. In this guide, we’ll walk you through how to take out the old housing and install a new one so your fridge can get back to running smoothly. Let’s get started.

Watch here: How to install water filter housing on a refrigerator
The information in this article may not apply to your specific appliance model. We recommend consulting your manufacturer’s documentation or contact us with any questions.
Safety first
When working on any appliance, remember to keep safety first. Here are some tips to keep in mind:
- Always power off and unplug your appliance or switch off the circuit breaker before you attempt any maintenance or replacement work. This keeps you safe by preventing any risk of electric shock.
- Take your time while working to prevent accidents and personal injuries. Rushing is the enemy of precision.
- Work in a well-lit area so you can clearly see and access appliance parts.
- Keep your workspace free of clutter and other obstacles. Keep children and pets away from the work area.
- Be gentle when handling or removing parts. Excessive force might damage the appliance or cause personal injury.
- Wear insulated work gloves to protect your hands from sharp metal parts and debris.
- Consider wearing safety glasses and/or a dust mask when working with chemicals, dust or a large amount of debris to prevent irritation or injury.
- Turn off the water supply at the outlet before beginning repairs. Keep towels ready to catch any residual water in the system when removing parts.
Tools and materials needed
To replace a Whirlpool refrigerator water filter housing you will need:
- 1/4-inch nut driver
- Small flat blade screwdriver
- 1/2 inch open-ended wrench
- Towel
- Water Filter Housing Part # WPW10394053 – Take your model number to AppliacnePartsPros.com to locate the correct part for your unit.
Replacement Steps
Step 1: Prep the Area
- Open the fridge door to access the water filter housing.
- The housing is located in the top right rear corner of the fresh food section.
- Remove the top shelf to give yourself more working room.
- Lay down a towel beneath the housing to catch any water that might drip out.
Step 2: Remove the Old Water Filter
- Open the cover on the water filter housing.
- Pull the filter straight out and set it aside.
Step 3: Remove the Filter Housing Cover
- Using a 1/4-inch nut driver, remove the screw at the bottom of the housing cover.
- Lower the cover slightly and then pull it forward, it’ll come off pretty easily.
Step 4: Remove the Housing Itself
- Remove the second 1/4-inch screw located underneath the actual filter housing.
- Slightly lift the housing upward, about a quarter inch, so it unhooks from the two mounting tabs.
- Gently drop the housing down.
Step 5: Disconnect the Water Lines
- You’ll see two red locking rings (one on each water line) where the tubes connect at the bottom.
- Use your small flat-blade screwdriver to carefully pop these red locking rings off.
- Grab your 1/2-inch open-ended wrench, press down on the collar around the water line, and pull the tubes out, one at a time.
Tip: The locking collar may feel stiff. Just push in while gently pulling the line out.
Step 6: Prep and Install the New Housing
- Grab your new water filter housing.
- Take the new locking rings (they come in two sizes).
- The larger ring goes on the right water line.
- The smaller ring goes on the left line.
- Snap each locking ring into place on the new housing.
Step 7: Connect the Water Lines
- Push the right (larger) tube into the right-side port on the housing until it’s firmly seated.
- Do the same with the left (smaller) tube.
- Give each line a light tug to make sure it’s locked in securely.
Step 8: Mount the New Filter Housing
- Lift the new housing up and hook the tabs into the mounting slots.
- Push it up and toward the wall, then slide it downward to lock it into place.
- Use your 1/4-inch nut driver to reattach the screw at the base of the housing.
Step 9: Reinstall the Housing Cover
- Line up the back tab of the housing cover with the slot in the wall.
- Slide it into position, lift the cover, and hold it in place.
- Secure it with the original 1/4-inch screw.
Step 10: Reinstall the Water Filter and Shelf
- Slide the water filter back into the new housing.
- Close the filter door securely.
- Remove the towel.
- Reinstall the top shelf by sliding it into place.
Step 11: Power and Test
- Close the refrigerator door.
- Plug the fridge back in or turn the circuit breaker back on.
- Wait a few minutes, then check for any leaks around the new housing.
- Run water through the dispenser or ice maker to ensure everything is working smoothly.
More information
Thanks for reading! We hope this guide helped you replace the water filter housing in your Whirlpool refrigerator.
If you still need some replacement parts, grab your model number and head over to AppliancePartsPros.com. We offer over two million parts and most orders arrive in two business days. If you need some help with finding the right part or placing an order, you can contact our team at 1 (877) 477-7278.
While you’re waiting for your new part to arrive, you can explore our DIY blog and watch thousands of video tutorials on our YouTube channel.
Be sure to follow us on Facebook, Twitter and Instagram to see our latest repair guides!
 https://www.appliancepartspros.com/b/wp-content/uploads/2024/10/APP-blog-square-24.jpg
1080
1080
Steven E
https://www.appliancepartspros.com/b/wp-content/uploads/2020/11/app-logo-std.png
Steven E2025-03-07 06:43:332025-03-07 06:43:43Troubleshooting GE refrigerator error code F5
https://www.appliancepartspros.com/b/wp-content/uploads/2024/10/APP-blog-square-24.jpg
1080
1080
Steven E
https://www.appliancepartspros.com/b/wp-content/uploads/2020/11/app-logo-std.png
Steven E2025-03-07 06:43:332025-03-07 06:43:43Troubleshooting GE refrigerator error code F5 https://www.appliancepartspros.com/b/wp-content/uploads/2024/10/APP-blog-square-17-1.jpg
1080
1080
Steven E
https://www.appliancepartspros.com/b/wp-content/uploads/2020/11/app-logo-std.png
Steven E2025-03-07 06:29:142025-03-07 06:29:24Troubleshooting GE refrigerator error code F6
https://www.appliancepartspros.com/b/wp-content/uploads/2024/10/APP-blog-square-17-1.jpg
1080
1080
Steven E
https://www.appliancepartspros.com/b/wp-content/uploads/2020/11/app-logo-std.png
Steven E2025-03-07 06:29:142025-03-07 06:29:24Troubleshooting GE refrigerator error code F6 https://www.appliancepartspros.com/b/wp-content/uploads/2024/10/APP-blog-square-10-1.jpg
1080
1080
Steven E
https://www.appliancepartspros.com/b/wp-content/uploads/2020/11/app-logo-std.png
Steven E2025-03-07 05:53:362025-03-07 05:53:44Troubleshooting GE refrigerator error code F105
https://www.appliancepartspros.com/b/wp-content/uploads/2024/10/APP-blog-square-10-1.jpg
1080
1080
Steven E
https://www.appliancepartspros.com/b/wp-content/uploads/2020/11/app-logo-std.png
Steven E2025-03-07 05:53:362025-03-07 05:53:44Troubleshooting GE refrigerator error code F105With nearly a decade of experience in providing top-notch customer service regarding appliance parts and repair, Steven enjoys sharing practical advice, troubleshooting tips, and interesting information to help readers stay informed.