How to Replace Whirlpool Refrigerator Power Cord WP67006506
Steven E / Monday June 2, 2025
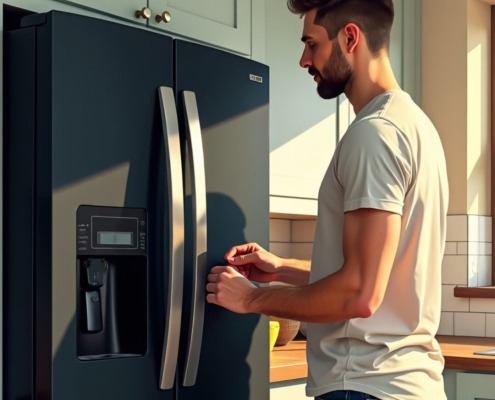
Is your Whirlpool fridge leaving you high and dry by refusing to turn on? The culprit might just be a faulty power cord, but don’t worry—our how-to video below will guide you through a simple replacement to restore your fridge’s power in no time! Dive in and get your kitchen humming again with our expert advice.
Looking for the right part? Enter your appliance model number below to find the exact match and get your appliance running like new again!

If your Whirlpool fridge isn’t turning on and you’ve ruled out the outlet, a damaged power cord could be the issue. Replacing it with part WP67006506 is a simple fix that can safely restore power and get your refrigerator running again.

Watch Here: How to replace a refrigerator power cord
The information in this article may not apply to your specific appliance model. We recommend consulting your manufacturer’s documentation or contact us with any questions.
Tools and Materials
Gather the following tools and part before beginning the power cord replacement:
- Whirlpool Power Cord WP67006506 – Take your model number to AppliancePartsPros.com to locate the correct part for your unit.
- 1/4-inch nut driver – To remove the access panel screws and detach and reattach the ground wire
Safety First
Safety comes first when working on any appliance. Here are some practical tips to help keep you safe:
- Always turn off the power by unplugging the appliance or switching off the circuit breaker before starting. This protects you from the risk of electric shock.
- Wear insulated gloves to protect your hands from sharp edges, pinching hazards, or debris.
- Take your time and work at a steady pace to avoid accidents or injuries.
- Make sure your workspace is well-lit so you can clearly see and access the parts you’re working on.
- Keep your area organized and free of clutter, and ensure children and pets are kept away from the workspace.
- Never handle internal parts with wet hands. Make sure both your hands and the work area are completely dry.
- Check your appliance’s user manual for specific instructions or safety guidelines related to your repair.
- Handle parts gently to prevent damaging the appliance or injuring yourself by using too much force.
- Wear safety glasses if you’re dealing with chemicals, dust, or large debris to protect your eyes.
- If the appliance was recently used, give it time to cool down before working on any heated components.
- Take photos or notes of wiring connections before disconnecting anything. This makes reassembly much easier.
- Avoid touching exposed wires or terminals. If you need to handle wires, use non-conductive tools or wear insulated gloves to reduce the risk of electrical shock.
Removal and Disassembly Steps
Make sure both power and water are off before beginning any repairs.
- Access the back of the refrigerator and locate the access panel on the bottom secured with screws along the top & bottom edges. The power cord feeds through a cutout slot in this panel.
- Use the 1/4-inch nut driver to remove the screws (usually 3-5 screws) from the access panel and set them aside in a safe place.
- Lift the panel slightly upward to dislodge the old power cord from a plastic fitting designed to hold it in place. Maneuver the cord through the cutout slot and out of the panel.
- With the cord removed, detach the panel completely by pulling it away from the refrigerator body. Set this aside as well – it will be replaced once the new power cord is installed.
- Locate the ground wire secured to the refrigerator body with a screw. Use the 1/4-inch nut driver to remove the ground screw completely.
- Follow the cord further up to find the plastic wiring harness connector. This interfaces with an internal harness pre-installed on the refrigerator.
- The wiring harness connector has locking tabs on either side. Compress these tabs inward with your thumb & forefinger while gently wiggling the connector free from its mated half. Be careful not to damage any of the delicate internal terminal pins.
- The old refrigerator power cord is now completely free and disconnected. Keep it handy for comparison when installing the replacement cord.
Installation and Reassembly Steps
- Orient the new cord so it aligns correctly with the internal harness, matching up the flat orientation tabs.
- Push firmly inward until the wiring harness connector locks completely into place with an audible snap. Gently tug on it to make sure it is fully seated.
- Route the ground wire over to meet the empty ground screw hole, then reattach using the 1/4-inch nut driver to securely fasten it. Verify the ground connection is tight.
- Retrieve the previously removed access panel. Maneuver the new cord into the cutout slot so it fits neatly with the panel contours.
- Angle the panel into place against the refrigerator body, aligning all edges flush without pinching the new cord.
- Insert the perimeter screws loosely first, then tighten each one down fully for a secure fit.
More Information
Thanks for reading! We hope this article helped you replace the power cord in your Whirlpool, KitchenAid or Maytag refrigerator.
If you still need some replacement parts, grab your model number and head over to AppliancePartsPros.com. We offer over two million parts and most orders arrive in two business days. If you need some help with finding the right part or placing an order, you can contact our team at 1 (877) 477-7278.
While you’re waiting for your new part to arrive, you can explore our DIY blog and watch thousands of video tutorials on our YouTube channel.
Be sure to follow us on Facebook, Twitter and Instagram to see our latest repair guides!
 https://www.appliancepartspros.com/b/wp-content/uploads/2025/03/APP-blog-square-2024-09-16T153228.297.jpg
1080
1080
Steven E
https://www.appliancepartspros.com/b/wp-content/uploads/2020/11/app-logo-std.png
Steven E2025-03-12 10:18:332025-08-06 12:57:29How to replace a Samsung refrigerator temperature sensor
https://www.appliancepartspros.com/b/wp-content/uploads/2025/03/APP-blog-square-2024-09-16T153228.297.jpg
1080
1080
Steven E
https://www.appliancepartspros.com/b/wp-content/uploads/2020/11/app-logo-std.png
Steven E2025-03-12 10:18:332025-08-06 12:57:29How to replace a Samsung refrigerator temperature sensor https://www.appliancepartspros.com/b/wp-content/uploads/2024/10/APP-blog-square-2024-09-16T153403.696.jpg
1080
1080
Steven E
https://www.appliancepartspros.com/b/wp-content/uploads/2020/11/app-logo-std.png
Steven E2025-03-12 07:24:582025-08-06 11:52:33How to replace a Frigidaire refrigerator ice maker fill tube
https://www.appliancepartspros.com/b/wp-content/uploads/2024/10/APP-blog-square-2024-09-16T153403.696.jpg
1080
1080
Steven E
https://www.appliancepartspros.com/b/wp-content/uploads/2020/11/app-logo-std.png
Steven E2025-03-12 07:24:582025-08-06 11:52:33How to replace a Frigidaire refrigerator ice maker fill tube https://www.appliancepartspros.com/b/wp-content/uploads/2024/10/APP-blog-square-19-1.jpg
1080
1080
Steven E
https://www.appliancepartspros.com/b/wp-content/uploads/2020/11/app-logo-std.png
Steven E2025-03-07 07:50:492025-03-07 07:50:58Troubleshooting GE refrigerator error code F3
https://www.appliancepartspros.com/b/wp-content/uploads/2024/10/APP-blog-square-19-1.jpg
1080
1080
Steven E
https://www.appliancepartspros.com/b/wp-content/uploads/2020/11/app-logo-std.png
Steven E2025-03-07 07:50:492025-03-07 07:50:58Troubleshooting GE refrigerator error code F3With nearly a decade of experience in providing top-notch customer service regarding appliance parts and repair, Steven enjoys sharing practical advice, troubleshooting tips, and interesting information to help readers stay informed.