How To Troubleshoot And Fix Error Code F1 On a Bosch Oven
Steven E / Tuesday May 13, 2025
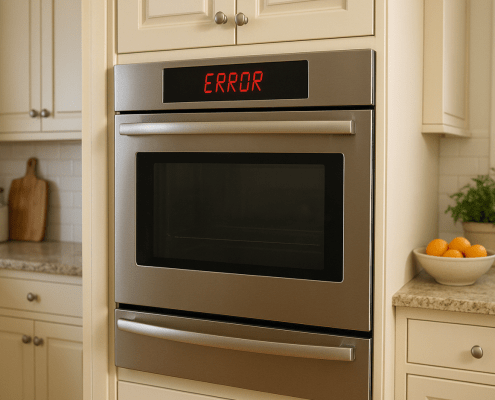
Experiencing an F1 error code on your Bosch oven? This fault code indicates an issue with the meat probe during a test or service mode. Don’t panic – with a few troubleshooting steps, you can likely resolve the problem on your own without calling for service. In this blog post, we’ll walk through the steps to diagnose and fix an F1 Bosch oven error code as well as helpful tips on how to enter the unit into test mode and how to prevent future errors.
The information in this article may not apply to your specific appliance model. We recommend consulting your manufacturer’s documentation or contact us with any questions.
What is the F1 error code?
The F1 fault code signifies that the meat probe ,also known as a temperature sensor, has failed during a test or service mode cycle on the oven. This could indicate a problem with the probe itself, or an issue with the connections between the probe and the oven. On Bosch ovens, the F1 code is only displayed during a test or service mode – you wouldn’t see it during normal cooking operations.
Entering test mode
To enter test mode on your Bosch oven:
- Press the Oven Mode button repeatedly until “Test Mode” appears on the display.
- Press Start to confirm and enter test mode.
- The oven will now run diagnostics and display any fault codes.
- To exit test mode, press Off at any time.
Test mode allows you to isolate faults, check oven components, and monitor error codes without the oven turning on.
Refer to your owner’s manual for the exact button names and process for your specific model. Entering this diagnostic mode is crucial for troubleshooting issues like F1 probe errors.
Safety precautions
When working on any appliance, remember to keep safety first. Here are some tips to keep in mind:
- Always power off and unplug your appliance or switch off the circuit breaker before attempting any maintenance or replacement work. This keeps you safe by preventing any risk of injury from electric shock.
- Wear insulated work gloves to protect your hands from sharp metal parts, pinching hazards and debris.
- Take your time and don’t rush while working to prevent accidents and personal injuries.
- Work in a well-lit area so you can clearly see and access the interior parts.
- Clear your workspace of clutter and other obstacles. Keep children and pets away from the work area.
- Never work on internal parts with bare wet hands. Make sure the work area is completely dry.
- Check your user manual to see if there are specific installation or safety instructions for your part or appliance.
- Be gentle when handling or removing parts. Excessive force might damage the appliance or cause injury.
- Wear safety glasses when working with chemicals, dust or cleaning large debris to prevent injury.
- If the appliance has recently been used, give it plenty of time for any heating parts to cool down before working on it.
- Take pictures or make a note of wiring terminals or other connections before disconnecting to prevent any problems with reassembly.
- When working with wires, avoid touching any exposed wires or terminals. If you need to touch a wire, use a non-conductive tool or wear insulating gloves to prevent electrical shock.
Troubleshooting steps
Now that you have entered test mode you can now proceed to troubleshoot as needed.
Step 1: Check the probe connections
The first step in troubleshooting an F1 fault is to thoroughly inspect the meat probe connections. A loose wire or faulty connector is often the culprit behind probe errors.
Here are some things to check:
- Make sure the probe plug is fully inserted into the jack. It takes a good amount of force to fully seat the connector. Check that it is pushed completely into the socket on the oven.
- Inspect the probe wires for damage. Look for any cuts, nicks, or pinches in the wire. Also check that the wires have not pulled out of the connector.
- Check for bent or broken pins. Carefully examine the pin connectors on both the plug and jack ends of the probe. Make sure none are bent, damaged, or missing.
- Check for wire burn. In some cases, the probe wire insulation can become burnt from contact with the oven heating elements. Replace the probe if any section looks burnt or melted.
- Remove and reseat connections. Unplug the probe from the oven and plug it back in to ensure a tight connection.
Probe connections are one of the most common factors in F1 faults, so be sure to thoroughly inspect them. Tightening up a loose plug or replacing a damaged probe wire will often resolve the problem.
Step 2: Test the probe resistance
If the connections check out OK, the next step is to check the probe itself for proper resistance. You’ll need to isolate the probe from the oven and use a multimeter to measure resistance.
Here is the process to test probe resistance:
- Disconnect power to the oven by unplugging it or switching the breaker off.
- Disconnect the meat probe plug from the jack on the oven.
- Set your multimeter to measure resistance (ohms).
- Touch the meter probes to the two prongs on the meat probe plug.
- A normal operating range of resistance measures around 1,000 ohms at room temperature.
- Note – the exact resistance may vary based on the probe model and temperature. Refer to the specific probe specs.
- If resistance is very high, fluctuating, or reads “OL”, there is an open break in the probe circuit indicating a faulty probe.
This resistance test determines if the internal probe wiring and thermistor are intact. An out-of-range reading confirms the probe itself has failed and needs replacement.
Step 3: Replace the faulty meat probe
If your testing indicates a faulty meat probe, the next step is to replace it:
- Order a new probe specifically designed for your Bosch oven model.
- Remove the old probe and install the new one. Make sure it is securely connected.
- Restore power and test oven operation.
- Enter test mode and verify the F1 code does not return.
- Do a test cook with the probe to confirm it is working properly.
Be sure to only replace the probe with the exact model specified for your oven. The connector type and probe length must match.
Replacing a damaged meat probe is often the solution for persistent F1 errors. Just be sure to properly connect the new probe.
Step 4: Retest the oven operation
Once you’ve replaced the meat probe, the final step is to thoroughly retest oven operation:
- Enter test mode again and verify the F1 code does not return. This confirms the fault is fixed.
- Do a test cook using the probe to make sure it is functioning properly and giving accurate temperature readings.
- Try the probe in several locations in the oven to ensure consistent operation.
- Also repeat troubleshooting steps 1-3 above if the fault returns.
It’s important to fully validate functionality of the new probe. Test mode provides diagnostics while an actual cook provides real-world testing.
Take your time to confirm the F1 is completely resolved before using the oven for important meals.
Additional information
Thank you for reading! We hope you found this information useful to get your oven working again.
If you have any other appliance repair needs or projects, don’t hesitate to explore our thousands of free videos and troubleshooting guides available. If you need replacement parts or some extra help, grab your model number and head over to AppliancePartsPros.com, where you can chat with a pro, order parts, read our DIY blog, and more.
Be sure to subscribe to us on YouTube and follow us on Facebook, Twitter, and Instagram!
With nearly a decade of experience in providing top-notch customer service regarding appliance parts and repair, Steven enjoys sharing practical advice, troubleshooting tips, and interesting information to help readers stay informed.


