How to Use the Meat Probe Feature on Your Built In Oven
Steven E / Monday April 28, 2025

If you’ve got a built-in oven meat probe and aren’t quite sure how to use it, you’re in the right place. This little gadget might seem a bit intimidating at first, but it’s actually a game-changer for cooking meat. Say goodbye to cutting into a roast to check if it’s done or guessing if your chicken is cooked all the way through. The meat probe takes all that guesswork out and helps you cook your meat perfectly every time.
Whether you’re preparing for a big holiday dinner or just making a simple weeknight meal, learning how to use your meat probe can make a huge difference in the outcome of your dishes. Let’s get started and make your next meal a perfectly cooked masterpiece.
If you need any replacement parts for your range or oven, you can enter your model number at AppliancePartsPros.com to order them. Most orders arrive in just two business days, and we have thousands of free guides to show you how to install your new parts.
The information in this article may not apply to your specific appliance model. We recommend consulting your manufacturer’s documentation or contact us with any questions.

What is a meat probe and how does it work?
A meat probe, also known as a temperature probe, is a precision cooking tool included with many modern built-in ovens. It consists of a metal rod connected to a wire that plugs into a special port inside the oven. The purpose of the meat probe is to measure the internal temperature of meat or other foods during cooking, providing real-time data to the oven’s control system. Using a meat probe eliminates the need to frequently open the oven door to manually check the meat’s temperature, which can cause significant heat loss and lead to longer cooking times and inconsistent results.
Before cooking, the end of the probe is inserted into the meat. The other end of the probe, which typically features a plug or some form of connector, is then inserted into a dedicated port or socket located inside the oven. This port is directly connected to the oven’s control system.
Once the oven is turned on and the cooking process starts, the probe begins to monitor the internal temperature of the meat in real-time. The oven’s display panel will often show the current temperature inside the meat, allowing you to see exactly how done the food is without opening the oven door.
When the meat reaches the pre-set internal temperature indicative of the desired level of doneness, the oven can alert the cook with a beep or signal. Some models will turn off automatically or lower the temperature to prevent the meat from overcooking.
How to use the probe
Step 1: Getting started
- Depending on your oven model, it may come equipped with either a single-point or a multi-point meat probe. This feature is designed to help you achieve precise temperature results for your food.
- Before using the probe feature, make sure your food is completely thawed and prepared. Insert the tip of the probe into the thickest part of the food, taking care to avoid bone, fat, or gristle. For best placement, consult your owner’s manual.
- Begin by preheating your oven. Select your cooking mode—such as traditional bake, convection bake, or convection roast—at your desired temperature, and press Start.
- you can use aluminum foil or other coverings to prevent excessive browning or to keep moisture in. Just make sure the probe’s tip remains properly inserted in the meat and that the foil does not interfere with the oven’s temperature sensors.
Step 2: Inserting and using the probe
- Once the oven is preheated, place your prepared food inside and connect the meat probe to the designated port outlet within the oven cavity. Due to high temperatures, use oven mitts or heat-resistant gloves for this step.
- Program the oven with your desired internal food temperature. The process to activate the probe feature may vary by model, typically involving selecting the probe option on your control panel and entering the desired temperature.
- You also have the option to start cooking without preheating the oven. Place the food and the probe as instructed, then proceed to set the desired internal food temperature.
Step 3: After cooking
- When the food reaches the set internal temperature, the oven will automatically shut off. Always use oven mitts or heat-resistant gloves when handling the hot probe.
- Avoid pulling on the probe cable. Instead, use the handle to safely remove the probe from the port outlet.
- Clean the probe with a damp cloth using soap and water. Avoid submerging the probe in water or leaving it inside the oven during self-clean or steam clean cycles.
- Do not store the meat probe inside the oven. Make sure it is cleaned and stored safely after each use.
Troubleshooting common issues
Even with the best preparations, troubleshooting may be necessary when using a built-in oven meat probe. Don’t worry; we’ve got you covered with some common issues and their solutions:
- Inaccurate readings: If you suspect your built-in meat probe is providing inaccurate readings, perform a calibration check following your oven’s user manual. Recalibrating the probe can restore its accuracy.
- Probe not detected: If the oven doesn’t recognize the probe when connected, ensure it is securely plugged into the jack or receptacle. If the issue persists, there may be a problem with the probe or the connection jack.
- Erratic readings: If the temperature readings fluctuate rapidly or unexpectedly, check for loose connections or damage to the probe cable. Ensure the probe is inserted correctly into the meat and that it isn’t touching any bones.
- Slow temperature increase: If the meat’s temperature rises too slowly, verify that the oven is properly preheated to the recommended temperature. If preheating isn’t required, check for any issues with the oven’s heating element.
- Overcooking or undercooking: If your meat consistently turns out overcooked or undercooked, double-check the probe’s programmed doneness settings. Adjust the settings to better align with your desired results.
- Oven error messages: If your oven displays error messages related to the meat probe, refer to the oven’s user manual for specific troubleshooting steps. Errors might indicate issues with the probe or the oven’s electronics.
- Probe cable damage: If the probe cable becomes damaged or develops kinks, replace the probe immediately. A damaged cable can compromise accurate temperature monitoring and safety.
- Intermittent readings: If the temperature readings are intermittent, check the probe connector for any debris or obstruction. Clean the connector and try connecting the probe again.
- Unresponsive controls: If the oven’s control panel becomes unresponsive or shows error codes, try resetting the oven by turning it off and on and check the probe jack for damage.
Additional information
Thanks for reading! If you need replacement parts for any of your appliances, check out AppliancePartsPros.com, where you can enter your model number to find exactly what you’re looking for. Most orders arrive in two business days, and we have thousands of free resources to show you how to install your new parts.
You can also reach our award-winning customer service team at 1-877-477-7278, chat with a pro on our website and watch thousands of free video tutorials on our YouTube channel.
 https://www.appliancepartspros.com/b/wp-content/uploads/2025/03/APP-blog-square-1-10.jpg
1080
1080
Steven E
https://www.appliancepartspros.com/b/wp-content/uploads/2020/11/app-logo-std.png
Steven E2025-04-01 06:22:592025-04-01 06:23:07Troubleshooting GE Monogram wall oven error code F0
https://www.appliancepartspros.com/b/wp-content/uploads/2025/03/APP-blog-square-1-10.jpg
1080
1080
Steven E
https://www.appliancepartspros.com/b/wp-content/uploads/2020/11/app-logo-std.png
Steven E2025-04-01 06:22:592025-04-01 06:23:07Troubleshooting GE Monogram wall oven error code F0 https://www.appliancepartspros.com/b/wp-content/uploads/2025/04/APP-blog-square-19.jpg
1080
1080
Steven E
https://www.appliancepartspros.com/b/wp-content/uploads/2020/11/app-logo-std.png
Steven E2025-04-01 06:18:242025-04-01 06:18:31Troubleshooting GE Monogram wall oven error code F3
https://www.appliancepartspros.com/b/wp-content/uploads/2025/04/APP-blog-square-19.jpg
1080
1080
Steven E
https://www.appliancepartspros.com/b/wp-content/uploads/2020/11/app-logo-std.png
Steven E2025-04-01 06:18:242025-04-01 06:18:31Troubleshooting GE Monogram wall oven error code F3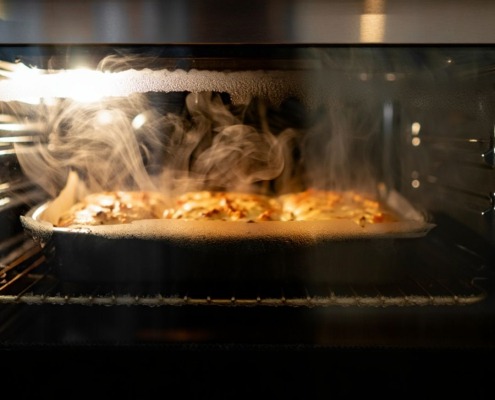 https://www.appliancepartspros.com/b/wp-content/uploads/2025/03/APP-blog-square-1-5.jpg
1080
1080
Steven E
https://www.appliancepartspros.com/b/wp-content/uploads/2020/11/app-logo-std.png
Steven E2025-03-27 06:12:282025-03-27 06:12:36How to use the steam clean feature on a GE oven
https://www.appliancepartspros.com/b/wp-content/uploads/2025/03/APP-blog-square-1-5.jpg
1080
1080
Steven E
https://www.appliancepartspros.com/b/wp-content/uploads/2020/11/app-logo-std.png
Steven E2025-03-27 06:12:282025-03-27 06:12:36How to use the steam clean feature on a GE ovenWith nearly a decade of experience in providing top-notch customer service regarding appliance parts and repair, Steven enjoys sharing practical advice, troubleshooting tips, and interesting information to help readers stay informed.