Ice Maker Making Too Little Ice: Top 6 Reasons & Fixes (With Video!)
APP Expert / Friday July 22, 2022
Feeling frustrated with an ice maker that just can’t keep up with the summer heat? Don’t let small ice cubes or a sluggish dispenser ruin your refreshing cold drinks. Dive into our step-by-step guide and accompanying how-to video below to troubleshoot and fix your refrigerator’s ice maker in no time!
Once you have identified the part needed for your ice maker, search below using your specific refrigerator model number to identify the exact part needed:
Summer’s here and it’s simply too hot to be fighting a stubborn ice maker. You don’t need to live with a refrigerator that isn’t making enough ice or producing cubes that are way too small. Grab your tool box, find that problem, and fix it yourself. You’ll save a pretty penny by fixing a problem like this yourself, and nothing beats the satisfaction of saving your family from this sweltering heat with some ice cold drinks.
Want to know how? Keep reading! In this guide, we’ll walk you through troubleshooting an ice maker that dispenses too little ice. Don’t forget to check out our companion video tutorial for more detailed steps and a few extra tips.


Troubleshooting An Ice Maker That Makes Too Little Ice
This guide deals specifically with in-refrigerator ice makers, and covers the most common issues experienced in all major refrigerator brands. Whether you’ve got a dispenser on your fridge or not, and regardless of your appliance’s brand, this tutorial should help you to diagnose what’s stopping your ice maker from producing an adequate amount of ice.
Before You Begin…
While not all of the tips we’re outlining here require that you crack into your fridge and start poking around, a few of them do, and you’ll need to disconnect the appliance from power and shut off the water supply before tackling those tests.
Most of these tests should take only a few minutes, but if you’re concerned that food or medication stored in your fridge could spoil while you work, be sure to move those items to a temperature safe location, like a cooler packed with ice, before beginning.
Your Diagnostic Tool Kit
You won’t need all of these items for every test, but having them all together before you start will make your life a bit easier:
- Your appliance’s manual and tech sheet
- A multimeter
- A refrigerator/freezer thermometer
- A Phillips screwdriver or nut driver, whichever is needed to remove the screws that hold components to your refrigerator.
- A condenser coil brush & vacuum or shop vac
- Work gloves
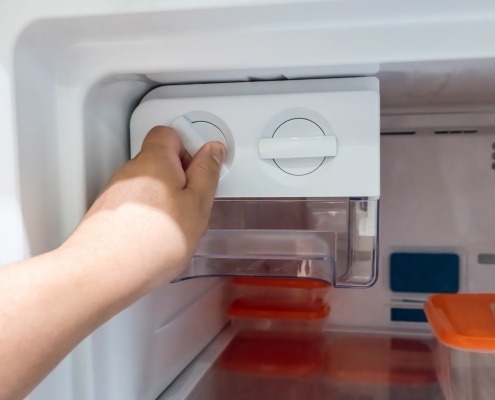
1. Make Sure The Ice Maker Is On And Not Locked
First things first, check your ice maker assembly. Is there an on/off switch? If so, make sure it’s on and not off or only halfway pressed.
Otherwise, check the shut-off arm. This lever will naturally go in or out or rise and fall as the ice bin fills with ice, signaling to the ice maker to stop the ice making process. If pushed inward to a certain point or raised high enough, the shut-off arm will lock into an off position. Ensure that the lever is not locked, or is not getting stuck in a lock position too soon. If it is locked, gently press up or in on it (depending on the style of lever) to release it.
2. Ensure The Freezer Is The Proper Temperature
For safe food storage, your freezer should maintain an internal temperature at or below 0°F. If it’s not this cold, not only will your ice maker not work as efficiently, you could potentially risk stored food thawing. So, your next step is measuring the internal temperature of your freezer.
Newer models with dispensers may have temperature readouts on the dispenser display, but you may want to manually check the internal temperature with a refrigerator thermometer.
- Start with the appliance powered.
- Place the thermometer between packages of frozen food.
- Close the freezer door and let it sit for at least five hours, up to eight hours.
- Once this time has passed, check the thermometer’s temperature.
If you’ve noticed the temperature is a bit high, you can try adjusting the cold controller down. You may also want to check the condenser coils. These metal tubes are on the back of your refrigerator, behind a rear access panel. They tend to collect a lot of dust, which makes your whole refrigerator run less efficiently and can potentially cause your freezer to be a bit too warm.
If your condenser coils look like they belong in a haunted house, carefully clean them using a condenser coil brush and a vacuum (ideally a shop vac). You’ll probably save a bit of money on your next electrical bill if you do this, too!
If the condenser coils weren’t the issue and you still have temperature troubles in your freezer, consult our dedicated guide for troubleshooting a freezer that’s too warm.
3. Check Your Water Pressure
If you’re not just getting too little ice but ice that’s too little, you could be dealing with poor water pressure. Your refrigerator ice maker must be connected to a cold water line that has water pressure between a certain PSI. You can check your refrigerator’s manual to see what this number should be.If you think your home’s water pressure is the issue, you will likely need to call your water utility company to have the problem resolved.
4. Testing The Ice Maker Itself
Now that you’ve eliminated the external issues, it’s time to check the ice maker itself. Usually, when an ice maker has failed, it’s reached an age where the most cost effective thing to do is replace the entire ice maker assembly with a newer model. However, depending on your refrigerator’s brand and age, you may be able to purchase the individual parts that make up the assembly affordably.
Here are some tests you can do on your ice maker:
Check The Shut-Off Arm For Damage
As we mentioned, the shut-off arm is a lever that, when pressed into an off position, signals for the ice maker to stop producing ice. You’ve already checked to make sure that the ice maker wasn’t locked into an off position, now it’s time to inspect the lever for damage.
If you can’t find a shut-off arm or lever at all, it may have fallen out and will need to be replaced.
Otherwise, to test this part, check by hand to make sure that the arm is mounted properly and that it is not stuck. It should rise and fall or go in and out easily. If it’s sticking or if it’s metal and showing signs of corrosion, it is likely the cause of your problems and will need to be replaced.
Use A Multimeter To Test The Ice Maker’s Components
The mold heater, motor, and external water valve solenoid can all be tested for ohms, and the mold thermostat can be tested for continuity. The specific values for those ohms test and how each test is done will depend on the make and model of your appliance.
Our companion video walks you through testing two different styles of Whirlpool refrigerator ice makers. Give it a watch for a detailed look at how those tests are done. If you have another brand of appliance, consult the manual for specific diagnostic instructions!
Check The Ice Tray
Examine the ice tray for damage, or signs of icy build up beneath the ice tray. If the tray is cracked, dented, or otherwise damaged, it could be leaking water or preventing ice from being formed. If this is the case, the tray, or the entire ice maker assembly, will need to be replaced.
Run A Test Procedure
Some ice maker models actually come equipped with an easy-to-use diagnostic test mode activated by a button. You may need to use a paperclip to start the test mode. Check your manual for further instructions. The test can tell you whether the ice maker or potentially the water inlet valve has failed.
5. Check The Water Inlet Valve
Water is released from the main supply line into the refrigerator via a valve usually found at the back of the appliance. This valve consists of a mounting bracket, solenoids that open and close, and a valve body.
There are a number of ways a water inlet valve can fail, which will prevent a sufficient amount of water from reaching the ice maker. Even if the ice maker test mode didn’t determine there was a problem with your refrigerator’s water inlet valve, you may still want to test it.
Here’s how that’s done:
- Start with the refrigerator unpowered and the water supply off.
- Access the valve. On the vast majority of refrigerators, you’ll find the water inlet valve on the back of the appliance, at the bottom, behind an access panel. This panel will need to be removed to reach the valve.
- Inspect the valve. Do you see any signs of leaking? Are all the hoses well connected? If the valve’s body is cracked, if any of the hoses are punctured, or if it seems like the seals on the hookups have worn out and the valve has been leaking, you’ll likely need to replace the valve.
- Inspect the water line leading to the ice maker and the fill spout in the freezer. Particularly if there is any icy build up on the fill spout, this could be a sign that there’s an issue inside of the valve itself, necessitating replacement.
- If everything looks okay, it’s time to test the valve’s solenoids for continuity. Grab your multimeter and set it to continuity, then touch the probes together to make sure it works.
- Determine which solenoid is the ice maker solenoid. Follow the water line from the ice maker down to the valve. The solenoid this line is connected to is your ice maker solenoid.
- Disconnect the solenoid and touch a probe to each terminal. The meter should show continuity. If it doesn’t, the solenoid has failed and the valve will need to be replaced.
6. Check The Water Filter Assembly
Water filter assemblies will vary in appearance depending on the make and model of your refrigerator, but most of them consist of a filter and a filter mounting point called a head or housing. You can find your refrigerator’s water filter either in the fresh food section or at the bottom of the fridge.
Here’s how to check your water filter assembly:
- Start by dispensing some water into a cup. Is the water pressure low? Does it take a really long time to fill the cup? Your water pressure assembly could be the issue.
- Change the filter, itself. Filters can become saturated with the debris they clean from your water. If this happens, it can decrease or even stop the flow of water into the ice maker. Most manufacturers recommend you swap out the water filter at least every six months.
- Make sure the filter is installed correctly. It shouldn’t be loose, and it should be locked in place.
- If you don’t have a filter in place at all, that may be the issue. If you aren’t using an in-refrigerator filter, you likely need a filter bypass cap for the system to work.
- Check the housing or head for signs of damage. A cracked or otherwise damaged filter housing can potentially prevent water from reaching the filter at all.
Test The Water Filter Check Valve At The Filter Head
You may be able to do this yourself. The check valve can generally be found inside the water filter head or housing. Here’s how to test it:
- Put a towel down beneath the water filter assembly.
- Remove the water filter.
- Use two small screwdrivers to press the check valve pins in.
- Have someone else press the dispenser button. If there’s no water flow or low water flow, then the check valve is bad, and the water filter head needs to be replaced.
Testing The Check Valve At The Water Filter Return Line
If you can’t find those pins or you can’t access them, there’s still another test you can do:
- Grab a bowl or other receptacle, then go around to the back of your fridge
- Using a wrench, disconnect the water filter return line from the Y-valve on the back of the fridge.
- Place the return line over the bowl.
- Go back around to the front of the fridge and press the dispenser button. If no water is dispensed, then your check valve is bad and needs to be replaced.
Finding The Right Replacement Part
If you’ve diagnosed your problem and your next step is replacing a damaged part, we’ve got you covered there, too. To figure out exactly what you’ll need, you’ll want to search for parts via your appliance’s model number. All refrigerators have that information printed on a sticker somewhere on the body. Check the following locations to track it down:
- On the exterior door or sides of the appliance
- Inside the door or on the door frame
- On the interior ceiling of the freezer or refrigerator compartment
- On the inside wall of either compartment
- On the fridge floor, beneath the crisper drawers
- Behind the kickplate at the bottom of the appliance
Once you have that model number, you can track down individual parts and entire new assemblies with ease. Search with the model number to find the right part on AppliancePartsPros.com. You’ll get a full list of compatible components, as well as tips and advice from other DIYers just like you. Order through us and you’ll have your new component in hand in as little as two days!
Wrapping Up
We hope our guide has helped you to figure out why your ice maker isn’t serving up enough ice. If you’ve found that you need to replace it entirely, we’ve got a guide for that on our blog. In fact, our blog and YouTube channel are full of helpful guides that can teach you how to fix and maintain your appliances yourself. The next time you need DIY help, keep AppliancePartsPros.com in mind! Our friendly staff is happy to help.
 https://www.appliancepartspros.com/b/wp-content/uploads/2022/07/shutterstock_748396033-2.jpg
1001
1500
APP Expert
https://www.appliancepartspros.com/b/wp-content/uploads/2020/11/app-logo-std.png
APP Expert2022-07-22 13:44:262025-07-21 12:16:07Ice Maker Making Too Little Ice: Top 6 Reasons & Fixes (With Video!)
https://www.appliancepartspros.com/b/wp-content/uploads/2022/07/shutterstock_748396033-2.jpg
1001
1500
APP Expert
https://www.appliancepartspros.com/b/wp-content/uploads/2020/11/app-logo-std.png
APP Expert2022-07-22 13:44:262025-07-21 12:16:07Ice Maker Making Too Little Ice: Top 6 Reasons & Fixes (With Video!) https://www.appliancepartspros.com/b/wp-content/uploads/2022/07/shutterstock_561872713-2.jpg
1002
1500
APP Expert
https://www.appliancepartspros.com/b/wp-content/uploads/2020/11/app-logo-std.png
APP Expert2022-07-18 14:42:152025-07-21 12:06:53How to fix your refrigerator when it’s too cold
https://www.appliancepartspros.com/b/wp-content/uploads/2022/07/shutterstock_561872713-2.jpg
1002
1500
APP Expert
https://www.appliancepartspros.com/b/wp-content/uploads/2020/11/app-logo-std.png
APP Expert2022-07-18 14:42:152025-07-21 12:06:53How to fix your refrigerator when it’s too cold https://www.appliancepartspros.com/b/wp-content/uploads/2022/06/shutterstock_1713457372-3.jpg
1000
1500
APP Expert
https://www.appliancepartspros.com/b/wp-content/uploads/2020/11/app-logo-std.png
APP Expert2022-07-04 17:07:002025-07-21 11:06:45Ice Maker Makes Too Much Ice: Top 3 Reason and Fixes (With Video!)
https://www.appliancepartspros.com/b/wp-content/uploads/2022/06/shutterstock_1713457372-3.jpg
1000
1500
APP Expert
https://www.appliancepartspros.com/b/wp-content/uploads/2020/11/app-logo-std.png
APP Expert2022-07-04 17:07:002025-07-21 11:06:45Ice Maker Makes Too Much Ice: Top 3 Reason and Fixes (With Video!)Hi! I’m Matt H., and I’m thrilled to be your guide through the world of appliance repair with over 25 years of invaluable experience in the industry.
From the early days of my career, I have been deeply passionate about appliances and their inner workings. Over the years, I’ve seen it all – from vintage models to the latest cutting-edge technology – and I’ve dedicated myself to mastering the art of repair. With a toolbox in one hand and a wealth of knowledge in the other, I’ve tackled every challenge that has come my way, learning and growing with each repair.
Join me as we dive into the intricacies of appliance repair. From step-by-step repair guides to explanations of common problems and their solutions, I’ll be here to simplify the repair process and empower you with the knowledge you need to keep your appliances running smoothly.
Feel free to explore our blog, ask questions, and leave comments – this platform is a space for learning, sharing, and growing together. Let’s work together to ensure that your appliances continue to serve you for years to come.
Thank you for joining me on this journey, and I look forward to being your go-to resource for all things related to appliance repair!