Smart Storage Tips for KitchenAid Stand Mixers in Any Kitchen
Steven E / Thursday August 28, 2025
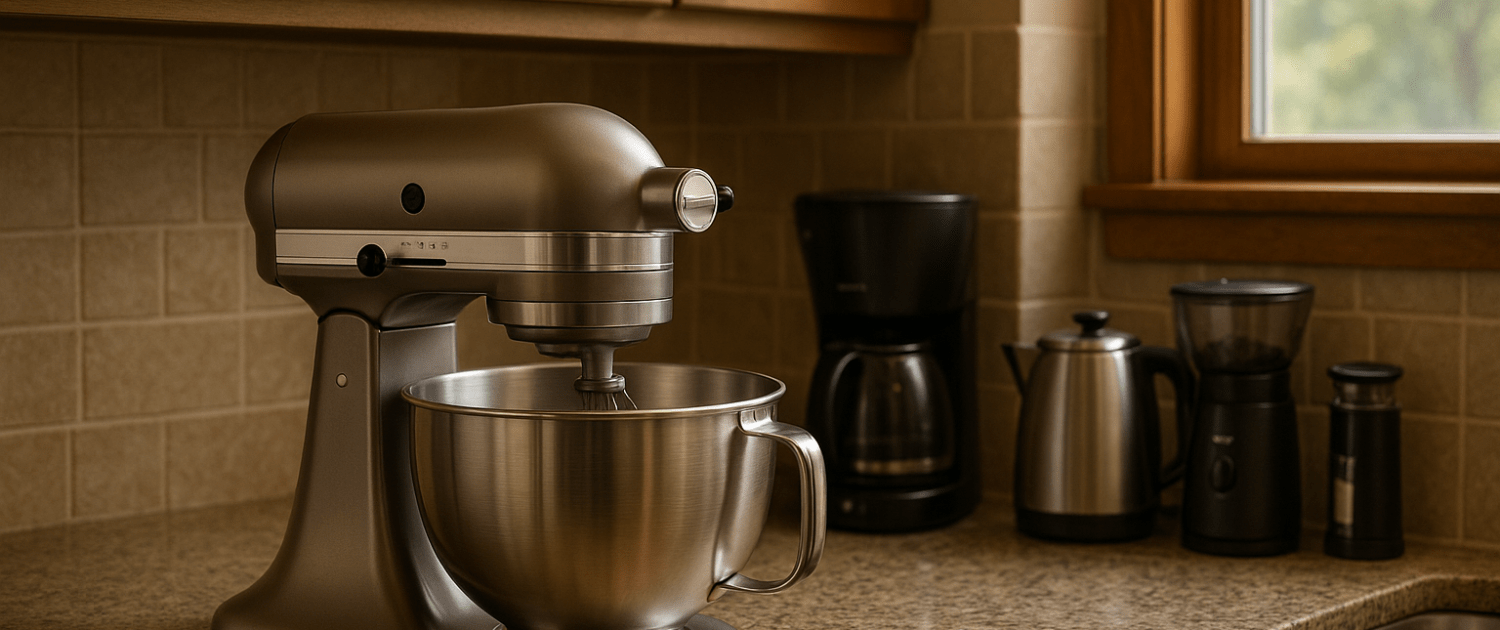
If you own a KitchenAid stand mixer, you already know it’s basically a kitchen roommate, helpful and happiest when it has a reliable place to stay. The tricky part? Finding that “forever home” so it’s easy to use, safe to move, and not hogging your entire counter. Whether you bake every weekend or only dust off the dough hook for holidays, we can help you choose the best storage setup for your space, habits, and back muscles.
Step One: Know Your Mixer (and Your Space)
Before you pick a spot, grab a tape measure and note three things:
- Height and footprint. Most tilt-head models stand around 14 inches tall (head down), while many bowl-lift models are closer to 16–17 inches. With the head tilted up, you may need 17–19 inches of clearance. Footprints are typically ~9″ x 9″, but measure your exact base.
- Weight. Expect roughly 20–30 pounds depending on the model. This matters for shelves, drawers, and how far you want to carry it.
- Reach & workflow. Where do you plug it in? Which counter is your “prep zone”? Do you prefer to keep it in sight or out of the way until baking day?
A quick sketch of your kitchen with measurements will save you from buying the wrong shelf or installing a lift that barely clears the countertop.
Countertop vs. Concealed: The Big Decision
Ask yourself:

- How often do you use it? Weekly bakers usually want it out. Monthly bakers can stash it nearby.
- Do you love how it looks? That pop of aqua can read like functional art, no shame in showing it off.
- How much counter space do you have? If the mixer forces you to chop onions on a cutting board balanced over the sink, it’s time to rethink.
If you’re torn, aim for nearby-but-not-in-the-way: a short move from a cabinet, cart, or pantry shelf to your main prep area.
Option 1: Proudly on the Counter
Keeping the mixer on the counter is the simplest solution, no lifting, no hunting, always ready. Make it tidy and ergonomic with a few small tweaks:
- Slide board or “mixer sled.” Place the mixer on a cutting board, stone slab, or low-friction slider pads. Now you can gently pull it forward to use and push it back to park without scraping your counter or wrenching your wrists.
- Silicone mat. A thin mat helps with vibration, catches drips, and protects the finish. It also keeps the mixer from “walking” on high speeds.
- Cable tidy. Use a cord wrap or simple Velcro strap. A dangling cord is a spill magnet.
- Dust cover. A washable cover keeps grease and flour off the nooks and crannies if you don’t use it weekly.
- Designate the zone. Keep the bowl and main attachments (flat beater, wire whip, dough hook, etc) within arm’s reach, either in the bowl or in a small bin right next to the mixer.
Pros: Always ready, zero lifting, encourages use.
Cons: Claims counter real estate, needs occasional dusting.
Option 2: Appliance Garage
An appliance garage is basically a countertop cabinet with a roll-up or flip-up door. It keeps your mixer in place but out of sight.
- Measure twice. Check height with the head tilted up. Ensure the door fully opens without clipping the head or the bowl.
- Power access. If the garage has an outlet inside, you can mix with the door open and slide the mixer forward.
- Ventilation. Leave a little breathing room behind and above, mixers don’t run hot like ovens, but airflow keeps the motor from overheating.
Pros: Hidden but convenient, minimal lifting.
Cons: Requires the right cabinet size; door clearance can be finicky.
Option 3: Deep Drawer With a Mixer Lift
A mixer lift is a spring- or gas-assisted shelf that raises your mixer to counter height from a base cabinet. It’s the unicorn of appliance storage: concealed, ergonomic, and cool enough to impress anyone who wanders into your kitchen.
- Cabinet depth/width. Standard base cabinets usually work, but confirm the lift hardware and shelf dimensions match your mixer.
- Counter overhang. The raised shelf should sit flush and stable with your countertop. Wobble = frustration.
- Weight rating. Choose a lift designed for heavy stand mixers and follow the manufacturer’s installation guide.
Pros: Concealed, almost no lifting, very ergonomic.
Cons: Hardware cost, requires installation, and needs a correct cabinet size.
Option 4: Rolling Cart or Utility Rack
Short on cabinets? A rolling cart (with locking casters) or a sturdy wire rack turns your mixer into a nimble little workstation.
- Top shelf for the mixer. Keep it at counter height so you can use it right on the cart.
- Lock those wheels. You do not want a runaway spiralizer.
- Bins for attachments. Label one for “Mixing Essentials” and one for “Specialty Attachments” (pasta, food grinder, etc.).
- Cable management. Zip ties or a cord reel keep things neat.
Pros: Flexible, renter-friendly, great for small kitchens.
Cons: Visual clutter if not styled, needs floor space.
Option 5: Pantry Shelf Parking
A walk-in pantry or tall cabinet shelf is perfect when you want the mixer near, but not constantly visible.
- Shelf height. Aim for mid-torso level so you can slide it out, not heave it overhead.
- Shelf strength. A mixer plus bowl and attachments can push 30+ pounds. Choose a solid shelf with good brackets.
- Anti-slide mat. A thin mat or felt sliders help with gentle in-and-out.
Pros: Clean look, space for attachments, easy to keep dust-free.
Cons: Requires a short carry to the counter.
Option 6: Corner Cabinet or Blind-Corner Solutions
If you’ve got a lazy Susan or pullout in a corner base cabinet, it might work, but check weight ratings. Many rotating shelves aren’t designed for heavy appliances.
- Test first with weights. Put a loaded stockpot on the shelf and gently spin/pull. Any flex or grinding? Not the place for your mixer.
- Rear parking, front swap. If the shelf is strong, consider parking the mixer in back and swapping lighter items up front when needed.
Pros: It uses awkward space and keeps counters clear.
Cons: Risk of overload; not all shelves are up to the task.
Option 7: Heavy-Duty Wall Shelf
Wall storage looks great, but safety matters. If you put a stand mixer on a wall shelf:
- Studs and serious brackets. Use heavy-duty hardware rated well above your mixer’s weight.
- Lower than shoulder height. You don’t want to lift a 25-pound appliance down from eye level.
- Front lip or rail. A small lip keeps the mixer from migrating forward.
Pros: Saves base cabinet space, looks intentional.
Cons: Installation skill required; height and safety are crucial.
A Quick Decision Tree
- Use it weekly or more? Counter or appliance garage.
- Use it monthly? Pantry shelf, rolling cart, or mixer lift.
- Hate visible clutter? Mixer lift or appliance garage.
- Limited cabinets? Rolling cart or heavy-duty wall shelf.
- Worried about lifting? Counter, garage, or lift, avoid high shelves.
Where To Find Us
If you need any replacement parts for your appliances, you can enter your model number at AppliancePartsPros.com to locate and order them quickly. Most orders arrive in just two business days, and we have tons of great information in our repair help section and YouTube videos to help you troubleshoot.
Stay connected with the latest DIY tips, tutorial videos, and repair guides by following us on Facebook, Instagram, and Twitter. We love hearing about your repair stories and successes. If you need more help or want personalized guidance, feel free to contact or call us at 877-477-7278. We’re ready to help you take on your next project with confidence!
Since 1999, AppliancePartsPros.com has helped millions of people repair their broken appliances by providing high-quality original parts at well below retail prices, free support and troubleshooting, and award-winning customer service from an expert, friendly, US-based customer support team!
Looking for the right part? Enter your appliance model number below to find the exact match and get your appliance running like new again!
 https://www.appliancepartspros.com/b/wp-content/uploads/2025/07/20250708_1036_Rustic-Laundry-Serenity_simple_compose_01jzn79csrepbr7q7b2gtxy4xw.png
1024
1536
Steven E
https://www.appliancepartspros.com/b/wp-content/uploads/2020/11/app-logo-std.png
Steven E2025-07-09 09:50:592025-07-09 09:51:09Laundry Steam Closet Smart Features Not Working? Here’s the Fix
https://www.appliancepartspros.com/b/wp-content/uploads/2025/07/20250708_1036_Rustic-Laundry-Serenity_simple_compose_01jzn79csrepbr7q7b2gtxy4xw.png
1024
1536
Steven E
https://www.appliancepartspros.com/b/wp-content/uploads/2020/11/app-logo-std.png
Steven E2025-07-09 09:50:592025-07-09 09:51:09Laundry Steam Closet Smart Features Not Working? Here’s the Fix https://www.appliancepartspros.com/b/wp-content/uploads/2025/07/20250708_1051_Mediterranean-Laundry-Haven_simple_compose_01jzn85km6ekt8jbpxw4zw0xwk.png
1024
1536
Steven E
https://www.appliancepartspros.com/b/wp-content/uploads/2020/11/app-logo-std.png
Steven E2025-07-09 08:54:582025-07-09 08:55:08How to Fix a Steam Closet With a Stuck Cycle or Long Cycle Times
https://www.appliancepartspros.com/b/wp-content/uploads/2025/07/20250708_1051_Mediterranean-Laundry-Haven_simple_compose_01jzn85km6ekt8jbpxw4zw0xwk.png
1024
1536
Steven E
https://www.appliancepartspros.com/b/wp-content/uploads/2020/11/app-logo-std.png
Steven E2025-07-09 08:54:582025-07-09 08:55:08How to Fix a Steam Closet With a Stuck Cycle or Long Cycle Times https://www.appliancepartspros.com/b/wp-content/uploads/2025/07/20250708_1135_Cozy-Laundry-Nook_simple_compose_01jznapbg9fm5rcatdkv87sj1v.png
1024
1536
Steven E
https://www.appliancepartspros.com/b/wp-content/uploads/2020/11/app-logo-std.png
Steven E2025-07-09 08:34:342025-07-09 08:34:44Why Your Steam Closet Water Smells Bad and How to Easily Fix It
https://www.appliancepartspros.com/b/wp-content/uploads/2025/07/20250708_1135_Cozy-Laundry-Nook_simple_compose_01jznapbg9fm5rcatdkv87sj1v.png
1024
1536
Steven E
https://www.appliancepartspros.com/b/wp-content/uploads/2020/11/app-logo-std.png
Steven E2025-07-09 08:34:342025-07-09 08:34:44Why Your Steam Closet Water Smells Bad and How to Easily Fix ItWith nearly a decade of experience in providing top-notch customer service regarding appliance parts and repair, Steven enjoys sharing practical advice, troubleshooting tips, and interesting information to help readers stay informed.
Leave a Reply
Want to join the discussion?Feel free to contribute!