Top Load Washer Not Draining or Spinning? Here’s What to Do
Steven E / Wednesday May 7, 2025
Dealing with a top load washer that won’t drain can be frustrating. In this article, we’ll walk you through the process of troubleshooting allowing you to save time and money by attempting to fix the problem yourself.
Before you invest in costly repairs or contemplate replacing your washer altogether, join us as we explore some of the most prevalent issues that can lead to drainage problems. From clogged hoses and blocked filters to malfunctioning pumps, we’ve got you covered. Our goal is to help you breathe new life into your top load washer and get back to doing laundry with ease!
If you find out that you need any replacement parts for your top load washer while you’re troubleshooting, you can enter your model number at AppliancePartsPros.com to order them. Most orders arrive in just two business days, and we have thousands of free guides to show you how to install your new parts.
The information in this article may not apply to your specific appliance model. We recommend consulting your manufacturer’s documentation or contact us with any questions.
What causes the problem
When your top load washer refuses to drain or spin, it can be frustrating and inconvenient. Several factors can contribute to this problem. Understanding the common causes can help you troubleshoot the issue effectively. Here are some potential culprits:
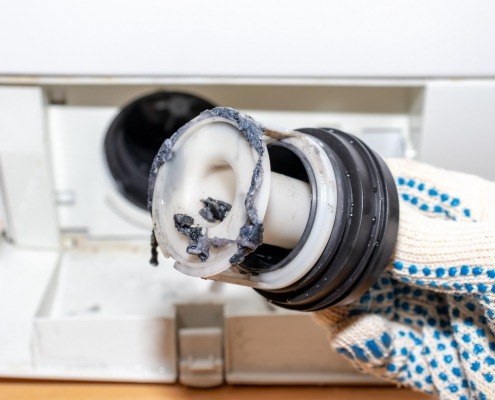
- Clogged drain hose: A clogged or blocked drain hose is one of the most common causes of drainage and spinning problems. Lint, debris, or foreign objects can accumulate in the hose, preventing proper water flow. This blockage can disrupt the draining process and hinder the spinning cycle.
- Overloaded washer: Overloading the washer with excessive laundry can strain the motor and cause the machine to shut down. When the washer detects an imbalance or excessive load, it may refuse to drain or spin to prevent damage. Ensuring you follow the manufacturer’s recommended load capacity can help prevent this issue.
- Faulty drain pump: The drain pump is responsible for removing water from the washer during the drain cycle. If the pump becomes defective or fails, it won’t be able to expel the water properly, leading to drainage and spinning issues.
- Lid switch malfunction: Top load washers are equipped with a lid switch that ensures the machine operates only when the lid is closed. If the lid switch is faulty or damaged, it may not register that the lid is securely shut, causing the washer to halt the draining and spinning cycles.
- Problems with the drive belt: In top load washers, the drive belt connects the motor to the transmission system, facilitating spinning and agitating actions. If the drive belt is worn out, loose, or broken, it can impede the spinning function.
- Timer or control board issues: The timer or control board regulates the various cycles and operations of the washer. If either of these components malfunctions, it can disrupt the drain and spin functions.
Safety precautions
When working on any appliance, remember to keep safety first. Here are some tips to keep in mind:
- Always power off and unplug your appliance or switch off the circuit breaker before attempting any maintenance or replacement work. This keeps you safe by preventing any risk of injury from electric shock.
- Turn off the water supply at the outlet before beginning repairs to any appliance parts that hold water. Have towels ready for any residual water in the system when removing parts.
- Wear insulated work gloves to protect your hands from sharp metal parts, pinching hazards and debris.
- Don’t test wiring with a multimeter for live voltage if you’re unfamiliar with how to prevent short circuiting when testing.
- When working with wires, avoid touching any exposed wires or terminals. If you need to touch a wire, use a non-conductive tool or wear insulating gloves to prevent electrical shock.
- Take your time and don’t rush while working to prevent accidents and personal injuries.
- Work in a well-lit area so you can clearly see and access the interior parts.
- Clear your workspace of clutter and other obstacles. Keep children and pets away from the work area.
- Never work on internal parts with bare wet hands. Make sure the work area is completely dry.
- Check your user manual to see if there are specific installation or safety instructions for your part or appliance.
- Be gentle when handling or removing parts. Excessive force might damage the appliance or cause injury.
- Wear safety glasses when working with chemicals, dust or cleaning large debris to prevent injury.
- If the appliance has recently been used, give it plenty of time for any heating parts to cool down before working on it.
- Take pictures or make a note of wiring terminals or other connections before disconnecting to prevent any problems with reassembly.
Troubleshooting steps
Check the drain hose for clogs
- Turn off the washer and pull the drain hose out of the standpipe.
- Inspect the end of the drain hose for any lint or debris clogging it.
- Clear any clogs in the drain hose that could be obstructing water flow.
Manually drain the tub
- Lower the drain hose into a bucket placed close to the floor.
- Check if water freely drains out of the tub using gravity alone.
- If the water flows freely, the issue may lie with the house drain. Check for clogs in the house drain pipe using a plumber’s snake.
- If no water flows out of the drain hose during gravity draining, use a shop vac to remove the water from the washer tub.
- You can also manually bail out water from the tub and use a shop vac to remove the remaining water from the tub.
- Once the water is removed, disconnect the drain hose from the back.
- Examine the drain hose for any clogs or obstructions.
Inspect the drain pump
- Turn off the water valves and disconnect the fill hoses from the back of the washer.
- Tilt the washer over and locate the drain pump.
- Disconnect the hose connected to the drain pump and check for small items or debris.
- Remove any screws holding the drain pump in place and inspect the area between the pump and the tub for obstructions.
- If no clogs are found and water drained into the bucket using gravity, it is likely that the drain pump is malfunctioning.
- A faulty drain pump won’t push water out during the normal drain cycle.
- If the pump runs but fails to move water, it needs to be replaced.
Test the lid switch
- Open and close the lid of the washer firmly to ensure it is making proper contact with the lid switch. Sometimes, the switch may not engage if the lid is not fully closed.
- Inspect the lid switch for any visible signs of damage or wear. If you notice any broken or loose components, the switch may need to be replaced.
- Use a multimeter to test the continuity of the lid switch. With the washer unplugged, disconnect the lid switch wiring harness and connect the multimeter probes to the switch terminals. If there is no continuity when the lid is closed and continuity when the lid is open, the switch is defective and should be replaced.
Check the belt
- Unplug the washer and access the belt by removing the back panel or the front panel, depending on the model of your washer.
- Inspect the belt for any signs of wear, fraying, or stretching. If the belt appears damaged or loose, it should be replaced.
- To remove the old belt, release tension by adjusting the motor or tension pulley. Install the new belt by looping it around the motor and transmission pulleys, ensuring it is properly aligned.
- Test the washer by running a spin cycle to see if the new belt resolves the issue. If the belt is correctly installed and the washer still won’t spin, there may be other underlying problems.
Timer/control board issues
- Check for error codes displayed on the washer’s control panel. Consult the user manual or manufacturer’s website to decode the error codes and determine the specific issue.
- Power off the washer and unplug it from the electrical outlet for a few minutes to perform a reset. This can sometimes clear minor glitches or errors in the control board.
- Inspect the control board for any visible signs of damage, such as burnt components or loose connections. If you notice any issues, the control board may need to be replaced.
Additional information
Thank you for reading! We hope this guide helped you get your top load washer working again.
If you have any other appliance repair needs or projects, don’t hesitate to explore our other troubleshooting guides and videos.
If you need replacement parts or some extra help with ordering them, grab your model number and head over to AppliancePartsPros.com, where you can chat with a pro, read our DIY blog and more.
Don’t forget to subscribe to us on YouTube and follow us on Facebook, Twitter and Instagram!
With nearly a decade of experience in providing top-notch customer service regarding appliance parts and repair, Steven enjoys sharing practical advice, troubleshooting tips, and interesting information to help readers stay informed.


