Washing Machine Drains But Does Not Spin: Top 4 Problems and Fixes for Top-Loading and Side-Loading Washers (With Video!)
APP Expert / Monday August 2, 2021
Is your washing machine draining but refusing to spin, leaving you with soggy clothes and a spinning headache? Fear not—our step-by-step guide and tutorial video are here to help you troubleshoot and tackle this common household dilemma. Dive into the solutions below and get your washer back in the fast lane today!
When a washing machine drains but it doesn’t spin, there are a four main components that may be causing an issue. Before moving to the troubleshooting stage, you should always be sure that you are considering safety. When working on a washing machine, that means you should either unplug it from the wall or turn off the circuit breaker. The hot and cold water supply should also be turned off. Once your washer is safe to work with, proceed with this easy guide to troubleshoot which washer part what is causing your washing machine not to spin.
When you have identified the part needed for your washer, search below using your specific washing machine model number to identify the exact part needed:

1. Coupler
The first thing to look at when the washing machine won’t spin but does drain is the coupler. This is a part that connects the transmission and motor together in older models of direct-drive top-loading washers. A coupler has three different components, one which is made of rubber and two which are made of plastic. All the parts work together to ensure the motor continues to spin on the transmission. The plastic parts are located on the motor and transmission and the plastic part is between the two. This is used to help absorb vibrations while the washer runs.
When the coupler has become broken or no longer works, the motor may run and the washer will drain but it can slow down or stop spinning. Broken couplers can also create loud sounds when the broken pieces start to grind against one another. If this happens, the washer may also accumulate pieces of rubber and plastic under it. If the coupler is broken or no longer working, it will have to be replaced.
To replace the coupler, the drain pump needs to be released, the drive motor should be removed, and the broken coupler should be taken off. The new replacement coupler can be installed using a hammer and a screwdriver. Once that’s done, the drain pump and the drive motor can be placed back on the washer. This will allow the washer to start running as normal again.

2. Drive Belt
Drive belts are another component that can make the washer refuse to spin but continue to drain. The belt will be connected to the drive pulley and the motor pulley and help the inner tub spin and agitate. Belts are available as V belts or multi-groove belts and either of them can become broken, fall off, or stretch out. Those with top-loading washers will find the belt at the bottom of the washer, while front-loading washers will be found on the back.
The first step to check the belt is a visual inspection to find any damage. For a belt that has come loose and fallen off, it can be placed back on in some cases to make the washer begin spinning again. However, a drive belt that is damaged or overly stretched out will need to be replaced. Sometimes other signs will be present to show the belt isn’t working, such as the scent of burning rubber, sounds during the spin and wash cycle, or a tub that spins erratically.
The first thing to do is access the belt and take it off if it’s still connected to the drum. If it’s broken, it may also be found at the bottom of the washing machine. The replacement belt needs to be the same model and size as the original so it will fit just the same. Align it around the drum pulley while ensuring the flat side faces you before looping the other end to the motor pulley. Next, spin the water tub and it will help you align the new belt.
3. Clutch
If you own a top-loading washing machine, the clutch is the next part that you should inspect. This component is responsible for making sure the washer speed gradually increases while the spin cycle is going. While there are a variety of clutches that can be inside washing machines, each of them does the same thing in the same way. The inside of the clutch houses a material similar to a brake pad that grips and drives the washer. When the material wears down, the clutch can stop working the way it should. This can slow down or stop the spin cycle entirely.
In most cases, you’ll find the clutch at the bottom of the washing machine. If the washer tub isn’t spinning or is spinning slowly, but noises are coming from the area of the clutch, this indicates that the clutch might not be working the way it should be. If this is the case with your washing machine clutch, it will need to be replaced so it can resume spinning.
4. Drive Pulley
The last thing to consider when a washing machine pumps but does not spin is the drive pulley. This is responsible for driving the washer with the help of the motor pulley. Many drive pulleys are made of metal, but some can be found that are made out of plastic. It connects to the motor pulley and the drive belt is wrapped around it. If the drive pulley becomes damaged or bent, it will need to be replaced.
Sometimes the mounting hole in the drive pulley can also become rounded out, which can create noise and make it wobble as it spins. If you have a top-loading washing machine, this part will be found at the bottom of the transmission. On a front-loading washer, you can find it on the back of the spider arm.
Locate the pulley in the washer and look it over for any damage. If there are any issues, the drive pulley will need to be replaced. A wrench can be used to remove the bolt that holds it and then the part can be taken off the cylinder. Then the new part can be placed to prevent further problems with the washing machine.
Where To Find Us
If you need any replacement parts for your appliances, you can enter your model number at AppliancePartsPros.com to locate and order them quickly. Most orders arrive in just two business days, and we have tons of great information in our repair help section and YouTube videos to help you troubleshoot.
Stay connected with the latest DIY tips, tutorial videos, and repair guides by following us on Facebook, Instagram, and Twitter. We love hearing about your repair stories and successes. If you need more help or want personalized guidance, feel free to reach out. We’re ready to help you take on your next project with confidence!
 https://www.appliancepartspros.com/b/wp-content/uploads/2024/01/DALL·E-2024-01-18-15.40.55-A-front-load-washing-machine-in-a-modern-laundry-room-setting-depicted-in-a-realistic-style.-The-washing-machine-is-sleek-and-contemporary-featuring.png
1024
1792
Steven E
https://www.appliancepartspros.com/b/wp-content/uploads/2020/11/app-logo-std.png
Steven E2024-01-18 12:46:002025-07-25 12:39:45How to replace shock absorber W11415987 on a front-load Whirlpool, KitchenAid or Maytag washer
https://www.appliancepartspros.com/b/wp-content/uploads/2024/01/DALL·E-2024-01-18-15.40.55-A-front-load-washing-machine-in-a-modern-laundry-room-setting-depicted-in-a-realistic-style.-The-washing-machine-is-sleek-and-contemporary-featuring.png
1024
1792
Steven E
https://www.appliancepartspros.com/b/wp-content/uploads/2020/11/app-logo-std.png
Steven E2024-01-18 12:46:002025-07-25 12:39:45How to replace shock absorber W11415987 on a front-load Whirlpool, KitchenAid or Maytag washer https://www.appliancepartspros.com/b/wp-content/uploads/2024/01/Copy-of-IMAGE-TEMPLATE-FOR-BLOG-3.jpg
1080
1920
Steven E
https://www.appliancepartspros.com/b/wp-content/uploads/2020/11/app-logo-std.png
Steven E2024-01-18 09:15:242025-07-25 11:52:05How to replace the pressure switch in a Kenmore washer
https://www.appliancepartspros.com/b/wp-content/uploads/2024/01/Copy-of-IMAGE-TEMPLATE-FOR-BLOG-3.jpg
1080
1920
Steven E
https://www.appliancepartspros.com/b/wp-content/uploads/2020/11/app-logo-std.png
Steven E2024-01-18 09:15:242025-07-25 11:52:05How to replace the pressure switch in a Kenmore washer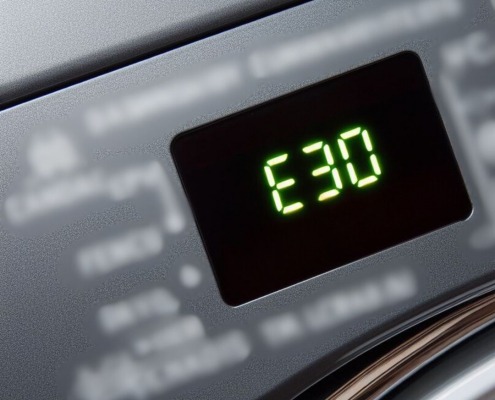 https://www.appliancepartspros.com/b/wp-content/uploads/2024/01/Untitled-design-6.jpg
1080
1080
Steven E
https://www.appliancepartspros.com/b/wp-content/uploads/2020/11/app-logo-std.png
Steven E2024-01-09 11:02:042025-07-25 09:32:25E30 error on a GE front-load washer: A troubleshooting guide
https://www.appliancepartspros.com/b/wp-content/uploads/2024/01/Untitled-design-6.jpg
1080
1080
Steven E
https://www.appliancepartspros.com/b/wp-content/uploads/2020/11/app-logo-std.png
Steven E2024-01-09 11:02:042025-07-25 09:32:25E30 error on a GE front-load washer: A troubleshooting guideHi! I’m Matt H., and I’m thrilled to be your guide through the world of appliance repair with over 25 years of invaluable experience in the industry.
From the early days of my career, I have been deeply passionate about appliances and their inner workings. Over the years, I’ve seen it all – from vintage models to the latest cutting-edge technology – and I’ve dedicated myself to mastering the art of repair. With a toolbox in one hand and a wealth of knowledge in the other, I’ve tackled every challenge that has come my way, learning and growing with each repair.
Join me as we dive into the intricacies of appliance repair. From step-by-step repair guides to explanations of common problems and their solutions, I’ll be here to simplify the repair process and empower you with the knowledge you need to keep your appliances running smoothly.
Feel free to explore our blog, ask questions, and leave comments – this platform is a space for learning, sharing, and growing together. Let’s work together to ensure that your appliances continue to serve you for years to come.
Thank you for joining me on this journey, and I look forward to being your go-to resource for all things related to appliance repair!