Whirlpool Dishwasher Lower Spray Arm W10803178 Install Guide
Steven E / Thursday June 19, 2025
Are your dishes coming out spotty, or does your dishwasher’s bottom rack seem neglected during a wash? The lower spray arm could be the culprit, especially in many Whirlpool models. Dive into our simple guide—and check out the video below—to learn how you can replace this vital part and return your dishwasher to its sparkling efficiency!
Looking for the right part? Enter your appliance model number below to find the exact match and get your appliance running like new again!
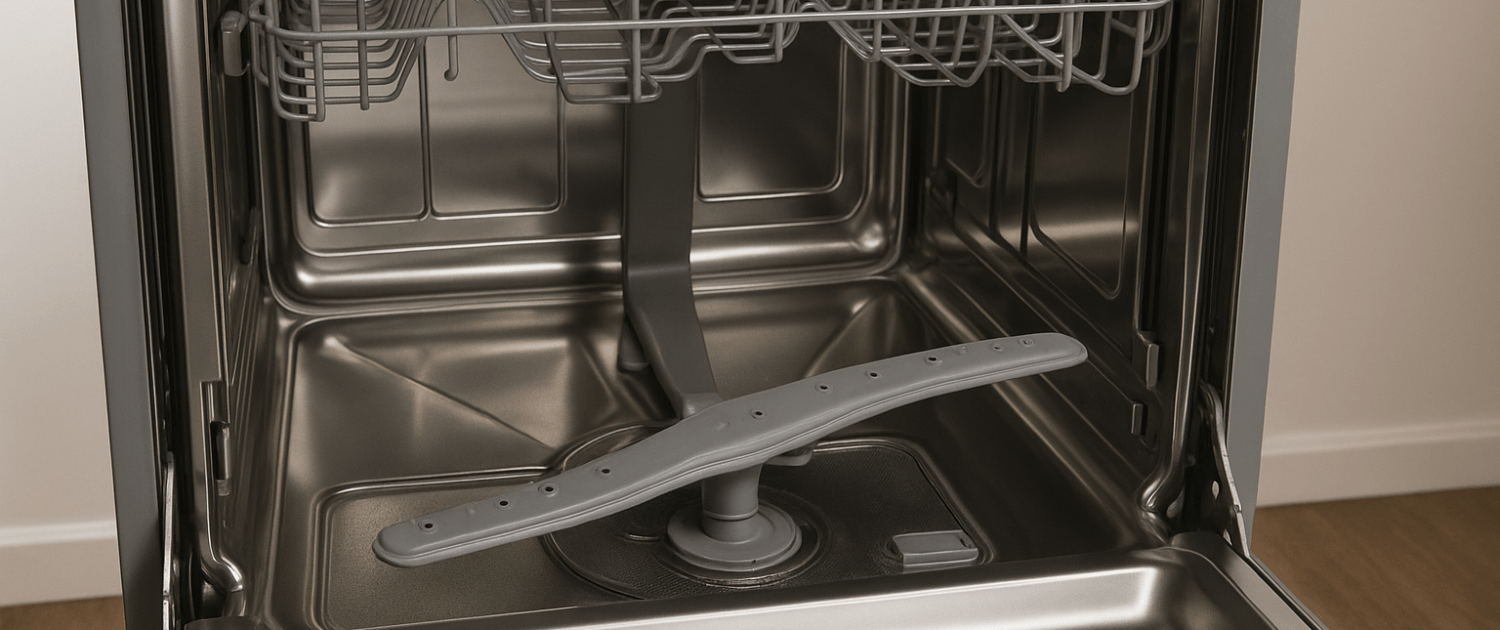
If your dishes are coming out dirty or the bottom rack just isn’t getting clean, the lower spray arm might be the problem. On many Whirlpool dishwashers, part number W10803178 is the component that spins and sprays water to clean everything on the lower rack. Over time, it can get clogged, cracked, or stop spinning properly. The good news is that replacing it is one of the easiest repairs you can do. In this guide, we’ll walk you through how to remove the old spray arm and snap in a new one so your dishwasher can get back to doing its job. Let’s get started.
Watch here: How to replace the lower spray arm in a dishwasher
The information in this article may not apply to your specific appliance model. We recommend consulting your manufacturer’s documentation or contact us with any questions.
Safety first
When working on any appliance, remember to keep safety first. Here are some tips to keep in mind:
- Always power off and unplug your appliance or switch off the circuit breaker before you attempt any maintenance or replacement work. This keeps you safe by preventing any risk of electric shock.
- If the appliance has recently been used, give it plenty of time to cool down before working on it.
- Take your time while working to prevent accidents and personal injuries. Rushing is the enemy of precision.
- Work in a well-lit area so you can clearly see and access appliance parts.
- Keep your workspace free of clutter and other obstacles. Keep children and pets away from the work area.
- Never work on internal parts with wet hands. Make sure the work area is completely dry.
- Check the user manual to see if there are specific installation or safety instructions related to your appliance or replacement part.
- Be gentle when handling or removing parts. Excessive force might damage the appliance or cause personal injury.
- Wear insulated work gloves to protect your hands from sharp metal parts and debris.
- Consider wearing safety glasses and/or a dust mask when working with chemicals, dust or a large amount of debris to prevent irritation or injury.
- Turn off the water supply at the outlet before beginning repairs. Keep towels ready to catch any residual water in the system when removing parts.
Tools and materials needed
To replace the lower spray arm on your Whirlpool dishwasher, you won’t require any tools. Simply have the new part on hand and follow these steps for a seamless replacement process.
You will need part #W10803178, remember to take your model number to AppliancePartsPros.com to locate the correct part for your unit.
Step 1: Access the lower spray arm
- Open the dishwasher door and locate the lower dish rack.
- Carefully roll out the lower dish rack and lift it up, placing it on a counter or sturdy surface nearby.
Step 2: Remove the old lower spray arm
- Locate the plastic base that holds the lower spray arm in place. This plastic base is at the center of the dishwasher cavity, where the water supply tube is located.
- Twist the plastic base counterclockwise to unlock the spray arm from its position. You may need to apply some force to overcome any resistance but be careful not to use excessive force to avoid damaging the plastic base.
- Once the plastic base is loosened, you can remove the old lower spray arm from the water supply tube.
Step 3: Install the new lower spray arm
- Inspect the new lower spray arm and identify the locking tabs and pins on its base. Typically, there are four locking tabs and four corresponding pins that help secure the spray arm in place.
- Carefully place the new spray arm onto the water supply tube, aligning the pins on the spray arm with the spaces between the locking tabs on the plastic base.
- Once the pins are positioned correctly, turn the plastic base clockwise until you hear a distinct click. This clicking sound indicates that the spray arm is securely locked into place.
It’s important to make sure that the new lower spray arm is properly installed and securely locked in position to prevent any water leaks or improper rotation during the wash cycle.
Step 4: Finish up
- Carefully place the lower dish rack back onto the wheels or guides inside the dishwasher cavity, and slide it back into its original position.
- Close the dishwasher door, making sure that it is properly aligned and secured.
- Plug the dishwasher back in or turn the circuit breakers back on to restore power to the appliance.
- Run a test cycle with the dishwasher empty to make sure that the new lower spray arm is functioning correctly. During the cycle, observe the water distribution and rotation of the spray arm to verify that it is operating as expected.
More information
Thanks for reading! We hope this guide helped you replace the lower spray arm in your Whirlpool dishwasher.
If you still need some replacement parts, grab your model number and head over to AppliancePartsPros.com. We offer over two million parts and most orders arrive in two business days. If you need some help with finding the right part or placing an order, you can contact our team at 1 (877) 477-7278.
While you’re waiting for your new part to arrive, you can explore our DIY blog and watch thousands of video tutorials on our YouTube channel.
Be sure to follow us on Facebook, Twitter and Instagram to see our latest repair guides!
With nearly a decade of experience in providing top-notch customer service regarding appliance parts and repair, Steven enjoys sharing practical advice, troubleshooting tips, and interesting information to help readers stay informed.


