Whirlpool Microwave Light Socket W10210871 Replacement Guide
Steven E / Friday May 16, 2025
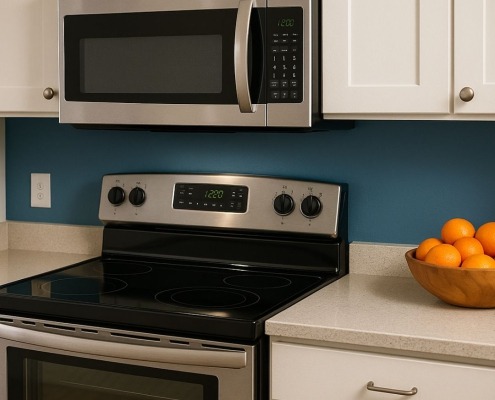
Is your Whirlpool microwave leaving you in the dark? It might not be just the bulb, but a faulty light socket causing the issue. Don’t worry, we’ve got you covered with an easy, step-by-step video tutorial right below that will guide you on how to replace that malfunctioning part and brighten up your cooking space again!
Looking for the right part? Enter your appliance model number below to find the exact match and get your appliance running like new again!

Trying to check on your food but the inside of your Whirlpool microwave is pitch black? It might not be the bulb, it could be the light socket (part W10210871) that’s the problem. The good news? Replacing it is a super simple fix you can knock out in no time. Grab a screwdriver and let’s walk through how to swap in a new socket and get your microwave shining bright again.

Watch: How to replace light socket
The information in this article may not apply to your specific appliance model. We recommend consulting your manufacturer’s documentation or contact us with any questions.
Why Microwave Light Sockets Fail
The light socket provides an electrical connection point and physical housing for the interior light bulb. Here are some of the most common reasons these parts wear out over time:
- Loose or damaged contacts – Electrical current flows through contacts in the socket to light the bulb. If these get bent, corroded, or loose, it can cause connection issues.
- Overheating – Constant heating and cooling cycles can degrade plastic components over many years of use. This can lead to cracking or warping.
- Faulty wiring – Age, vibration, and repeated opening/closing of the door can cause wiring issues like loose connections or exposed/frayed wires.
- Power surges – Electrical spikes can overload the light socket contacts and fry circuits.
Replacing the socket is a fairly simple repair that usually fixes the problem. If you’re seeing the symptoms above, it likely means the socket needs to be replaced.
Tools and Supplies Needed
Gather the following tools and supplies before beginning:
- Phillips head and flat blade screwdrivers
- Needle nose pliers (helpful but optional)
- Replacement light socket
- Gloves to protect hands from sharp edges
- Masking or painter’s tape to hold screws/parts
Always make sure to unplug the microwave before disassembling. It’s also wise to flip the circuit breaker supplying power to that outlet for added safety.
Accessing the Microwave Light Socket
On most models, the light socket is housed behind a removable bottom cover plate. Here are the general steps to safely access this component:
- Remove turntable, roller ring, and cooking tray – Open the microwave door and take out the glass turntable, roller ring, and metal cooking tray. This provides clearance to remove the bottom plate.
- Remove the bottom plate – Locate screws around the outer bottom edge. There may be as many as 10-12 screws. Support the microwave weight from underneath as you remove them. Carefully lower the bottom plate by 2-3 inches, taking care not to strain wiring harnesses.
- Disconnect wiring – The bottom plate will likely have wiring connections for the turntable motor and interior lighting. Gently release each of these wire connections.
- Remove bottom plate – With the wiring detached, you can fully remove the bottom plate to access the light socket.
Always take pictures or make sketches of the wiring routes for proper reassembly later. Also, use masking tape to label any harnesses you disconnect.
Removing the Faulty Microwave Light Socket
Once you have the bottom plate removed, you’ll see the plastic light socket housing mounted to the microwave frame. Follow these steps to detach and remove the old socket:
- Remove light bulb – Unscrew the bulb by turning it counter-clockwise. This will allow the socket to slide out of the mounting bracket.
- Remove bracket screw – Use a Phillips screwdriver to remove the screw that holds the plastic socket housing to the metal bracket.
- Detach wiring – There will be two wires, likely red and black, connecting to the rear of the socket. Note which wire goes where, then gently release them from their terminals.
- Remove old socket – You can now fully detach the faulty light socket and set it aside. Thoroughly inspect the socket, wires, and connections for any signs of damage. This can help determine the failure cause.
Be extremely careful not to apply too much force when releasing the wire terminals, as this could tear the wiring insulation. Needle nose pliers can help safely grip and detach the wires.
Installing the New Microwave Light Socket
Once the old socket is fully removed, installation of the new replacement part is straightforward:
- Attach wiring – Match the wire colors to the corresponding terminal on the new light socket. These are often labeled “N” for neutral (white wire) and “L” for line (black wire). Press the wires firmly into their terminals.
- Mount socket – Orient the socket with its tabs facing outward to fit into the microwave bracket. Replace the mounting screw to secure it in place.
- Install light bulb – Screw in the replacement bulb by turning it clockwise. Be careful not to overtighten.
- Reconnect wiring harnesses – Refer to any labels or sketches you made earlier to ensure you are reconnecting the wiring to the proper locations.
- Reinstall bottom plate – Set the cover in place, aligning any tabs or screw holes. Replace all perimeter screws.
Testing and Reinstalling the Microwave
Before mounting the microwave back in place, test it thoroughly:
- Plug it back in and verify the interior light turns on normally. Check that it toggles on/off with the door open/closed.
- Heat a cup of water to ensure the cooking functions are still working properly.
- Listen and look closely for any signs of arcing, buzzing, or abnormal behavior.
If everything checks out, reinstall the microwave:
- If wall-mounted, fasten it back to the brackets securely. Make sure any top exhaust vents align properly.
- For over-the-range models, set it carefully over the cooktop and secure any mounting screws.
- Reconnect ducting if vented to the outside. Seal joints with aluminum duct tape to prevent air leaks.
Where To Find Us
If you need any replacement parts for your appliances, you can enter your model number at AppliancePartsPros.com to locate and order them quickly. Most orders arrive in just two business days, and we have tons of great information in our repair help section and YouTube videos to help you troubleshoot.
Stay connected with the latest DIY tips, tutorial videos, and repair guides by following us on Facebook, Instagram, and Twitter. We love hearing about your repair stories and successes. If you need more help or want personalized guidance, feel free to reach out. We’re ready to help you take on your next project with confidence!
 https://www.appliancepartspros.com/b/wp-content/uploads/2025/04/APP-blog-square-204.jpg
1080
1080
Steven E
https://www.appliancepartspros.com/b/wp-content/uploads/2020/11/app-logo-std.png
Steven E2025-04-29 05:48:242025-08-11 11:18:55How to replace the door frame on a Whirlpool microwave
https://www.appliancepartspros.com/b/wp-content/uploads/2025/04/APP-blog-square-204.jpg
1080
1080
Steven E
https://www.appliancepartspros.com/b/wp-content/uploads/2020/11/app-logo-std.png
Steven E2025-04-29 05:48:242025-08-11 11:18:55How to replace the door frame on a Whirlpool microwave https://www.appliancepartspros.com/b/wp-content/uploads/2025/04/APP-blog-square-88.jpg
1080
1080
Steven E
https://www.appliancepartspros.com/b/wp-content/uploads/2020/11/app-logo-std.png
Steven E2025-04-15 08:38:492025-04-15 11:48:02Microwave Buttons Not Working: How to Fix The Keypad
https://www.appliancepartspros.com/b/wp-content/uploads/2025/04/APP-blog-square-88.jpg
1080
1080
Steven E
https://www.appliancepartspros.com/b/wp-content/uploads/2020/11/app-logo-std.png
Steven E2025-04-15 08:38:492025-04-15 11:48:02Microwave Buttons Not Working: How to Fix The Keypad https://www.appliancepartspros.com/b/wp-content/uploads/2025/04/APP-blog-square-71.jpg
1080
1080
Steven E
https://www.appliancepartspros.com/b/wp-content/uploads/2020/11/app-logo-std.png
Steven E2025-04-11 08:16:372025-04-11 08:16:46How To Measure an Over-the-Range Microwave For Replacement
https://www.appliancepartspros.com/b/wp-content/uploads/2025/04/APP-blog-square-71.jpg
1080
1080
Steven E
https://www.appliancepartspros.com/b/wp-content/uploads/2020/11/app-logo-std.png
Steven E2025-04-11 08:16:372025-04-11 08:16:46How To Measure an Over-the-Range Microwave For ReplacementWith nearly a decade of experience in providing top-notch customer service regarding appliance parts and repair, Steven enjoys sharing practical advice, troubleshooting tips, and interesting information to help readers stay informed.