Easy Whirlpool Refrigerator Door Gasket Replacement
Steven E / Monday May 12, 2025
Is your Whirlpool refrigerator struggling to keep its cool? A worn-out door gasket could be the culprit, causing frost buildup and temperature fluctuations. Fortunately, you don’t have to wait for a technician—our step-by-step guide, complete with a how-to video below, will walk you through everything you need to know to restore your fridge’s seal and efficiency in no time!
Looking for the right part? Enter your appliance model number below to find the exact match and get your appliance running like new again!
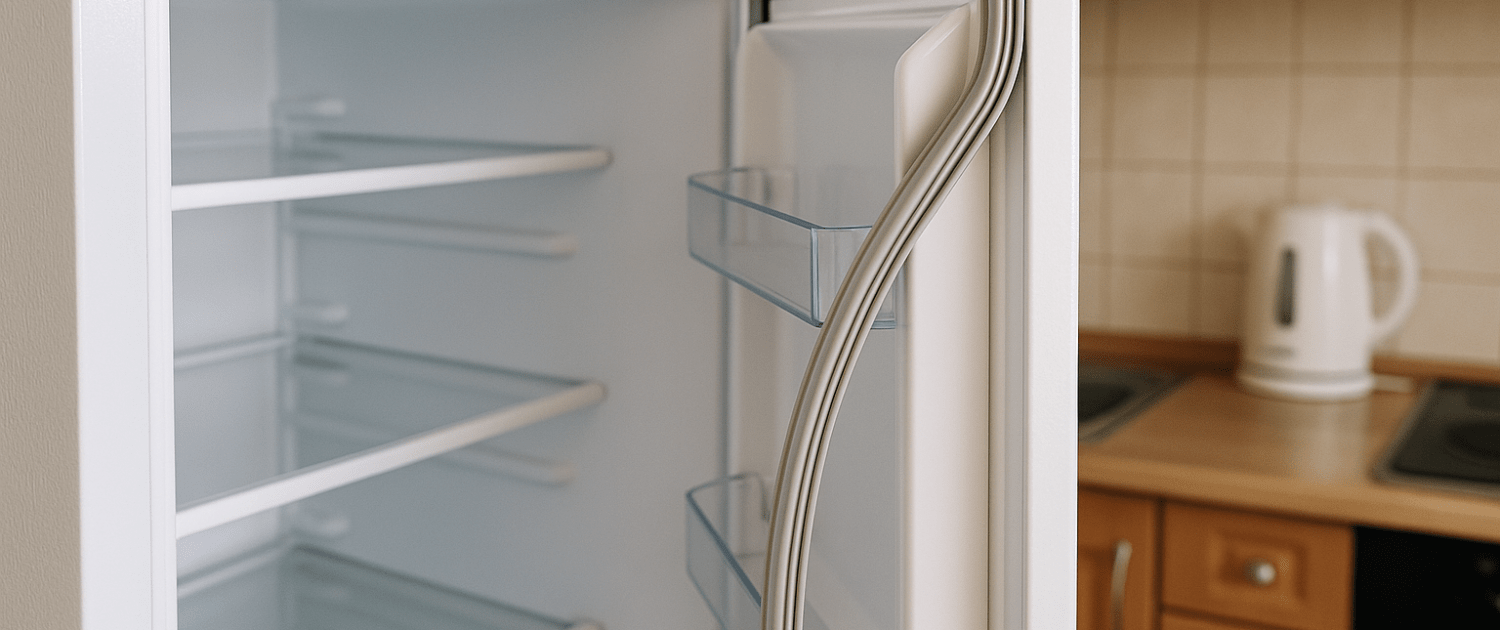
On a Whirlpool refrigerator, the door gasket is responsible for creating an airtight seal around the door, allowing your refrigerator to maintain the proper temperature. Common signs that indicate the need for replacement include visible tears, gaps in the seal, or frost buildup inside the refrigerator. Fortunately, with a few basic tools and some patience, you can tackle this repair yourself and get your refrigerator back in working order. So, let’s get started!

If you need any replacement parts for your appliance, you can enter your model number at AppliancePartsPros.com to order them. Most orders arrive in just two business days, and we have thousands of free guides to show you how to install your new parts.
The information in this article may not apply to your specific appliance model. We recommend consulting your manufacturer’s documentation or contact us with any questions.
Watch here: How To: Whirlpool/KitchenAid/Maytag Refrigerator Door Gasket W11396037
Safety precautions
When working on any appliance, remember to keep safety first. Here are some tips to keep in mind:
- Always power off and unplug your appliance or switch off the circuit breaker before attempting any maintenance or replacement work. This keeps you safe by preventing any risk of injury from electric shock.
- Wear insulated work gloves to protect your hands from sharp metal parts, pinching hazards and debris.
- Take your time and don’t rush while working to prevent accidents and personal injuries.
- Work in a well-lit area so you can clearly see and access the interior parts.
- Clear your workspace of clutter and other obstacles. Keep children and pets away from the work area.
- Never work on internal parts with bare wet hands. Make sure the work area is completely dry.
- Check your user manual to see if there are specific installation or safety instructions for your part or appliance.
- Be gentle when handling or removing parts. Excessive force might damage the appliance or cause injury.
- Wear safety glasses when working with chemicals, dust or cleaning large debris to prevent injury.
- If the appliance has recently been used, give it plenty of time for any heating parts to cool down before working on it.
- Take pictures or make a note of wiring terminals or other connections before disconnecting to prevent any problems with reassembly.
- When working with wires, avoid touching any exposed wires or terminals. If you need to touch a wire, use a non-conductive tool or wear insulating gloves to prevent electrical shock.
Tools and materials needed
- Replacement part (make sure it’s compatible with your model before installing)
- Flathead screwdriver
- 1/4″ nutdriver
- Heat gun
Replacement steps
Step 1: Disassembly and removal
- Remove the new gasket from its package.
- Lay it flat on a surface, preferably in the sun for a few hours to soften and shape it.
- If sunlight is not available, place the gasket in hot water for a couple of hours or use a hair dryer for careful heating.
- Open both French doors of the refrigerator.
- Since the left door gasket is more challenging due to the mullion divider, start by removing the divider.
- Use a screwdriver to remove the single screw in the center of the mullion.
- Push the mullion assembly upward to free the hinges at the top and bottom.
- Disconnect any electrical plug if present by pressing the tab and pulling it out. Set it aside for reinstallation.
- Use a flat screwdriver to pry the old gasket out from the groove. Start at one end and work your way around manually.
- Remove the old gasket completely.
Step 2: Installation and reassembly
- Take the new gasket and identify the two flappers (one at the top and one at the bottom).
- Ensure the flappers are facing outward.
- Start by pushing the edge of the gasket into the groove around the door.
- Begin with the corners, pressing it in securely.
- Move along the top, then down the sides, ensuring the gasket fits snugly into the groove.
- Close the door to verify the gasket is properly sealing against the cabinet with no gaps.
- If the gasket appears wavy, use a heat gun to carefully smooth it out. Be cautious not to melt the gasket.
- Open the door and reinstall the mullion divider by plugging it back in and securing it in place.
- Ensure the harness is properly placed in its cutout.
- Align the upper and lower hinges with the central piece of the mullion.
- Press everything down to lock the components into place.
- Insert the quarter-inch screw into the central piece of the mullion and tighten it with a nut driver.
- Check the gasket’s alignment at the divider once more.
- If there are any additional curls, use the heat gun to smooth them out.
- Close the refrigerator doors.
- Plug the refrigerator back in and ensure it is cooling effectively.
Additional information
Thanks for reading! We hope this guide helped you replace the door gasket on your Whirlpool refrigerator.
If you still need some replacement parts, grab your model number and head over to AppliancePartsPros.com. We offer over two million parts and most orders arrive in two business days. If you need some help with finding the right part or placing an order, you can contact our team at 1 (877) 477-7278.
While you’re waiting for your new part to arrive, you can explore our DIY blog and watch thousands of video tutorials on our YouTube channel.
Be sure to follow us on Facebook, Twitter and Instagram to see our latest repair guides!
 https://www.appliancepartspros.com/b/wp-content/uploads/2022/02/shutterstock_1005705295.jpg
1000
1500
APP Expert
https://www.appliancepartspros.com/b/wp-content/uploads/2020/11/app-logo-std.png
APP Expert2022-02-18 11:53:002025-07-18 06:52:53How To Replace A Refrigerator Water Line (With Video!)
https://www.appliancepartspros.com/b/wp-content/uploads/2022/02/shutterstock_1005705295.jpg
1000
1500
APP Expert
https://www.appliancepartspros.com/b/wp-content/uploads/2020/11/app-logo-std.png
APP Expert2022-02-18 11:53:002025-07-18 06:52:53How To Replace A Refrigerator Water Line (With Video!) https://www.appliancepartspros.com/b/wp-content/uploads/2022/02/shutterstock_762116845.jpg
1000
1500
APP Expert
https://www.appliancepartspros.com/b/wp-content/uploads/2020/11/app-logo-std.png
APP Expert2022-02-11 16:20:152025-07-18 05:58:21How To Replace A Refrigerator Thermostat (With Video!)
https://www.appliancepartspros.com/b/wp-content/uploads/2022/02/shutterstock_762116845.jpg
1000
1500
APP Expert
https://www.appliancepartspros.com/b/wp-content/uploads/2020/11/app-logo-std.png
APP Expert2022-02-11 16:20:152025-07-18 05:58:21How To Replace A Refrigerator Thermostat (With Video!) https://www.appliancepartspros.com/b/wp-content/uploads/2022/01/shutterstock_1291088506.jpg
1000
1500
APP Expert
https://www.appliancepartspros.com/b/wp-content/uploads/2020/11/app-logo-std.png
APP Expert2022-01-17 12:19:002025-07-17 12:56:51How To Replace A Refrigerator Crisper Pan (With Video!)
https://www.appliancepartspros.com/b/wp-content/uploads/2022/01/shutterstock_1291088506.jpg
1000
1500
APP Expert
https://www.appliancepartspros.com/b/wp-content/uploads/2020/11/app-logo-std.png
APP Expert2022-01-17 12:19:002025-07-17 12:56:51How To Replace A Refrigerator Crisper Pan (With Video!)With nearly a decade of experience in providing top-notch customer service regarding appliance parts and repair, Steven enjoys sharing practical advice, troubleshooting tips, and interesting information to help readers stay informed.