F10 Error Code Explained For A Whirlpool Washing Machine
Steven E / Thursday May 8, 2025
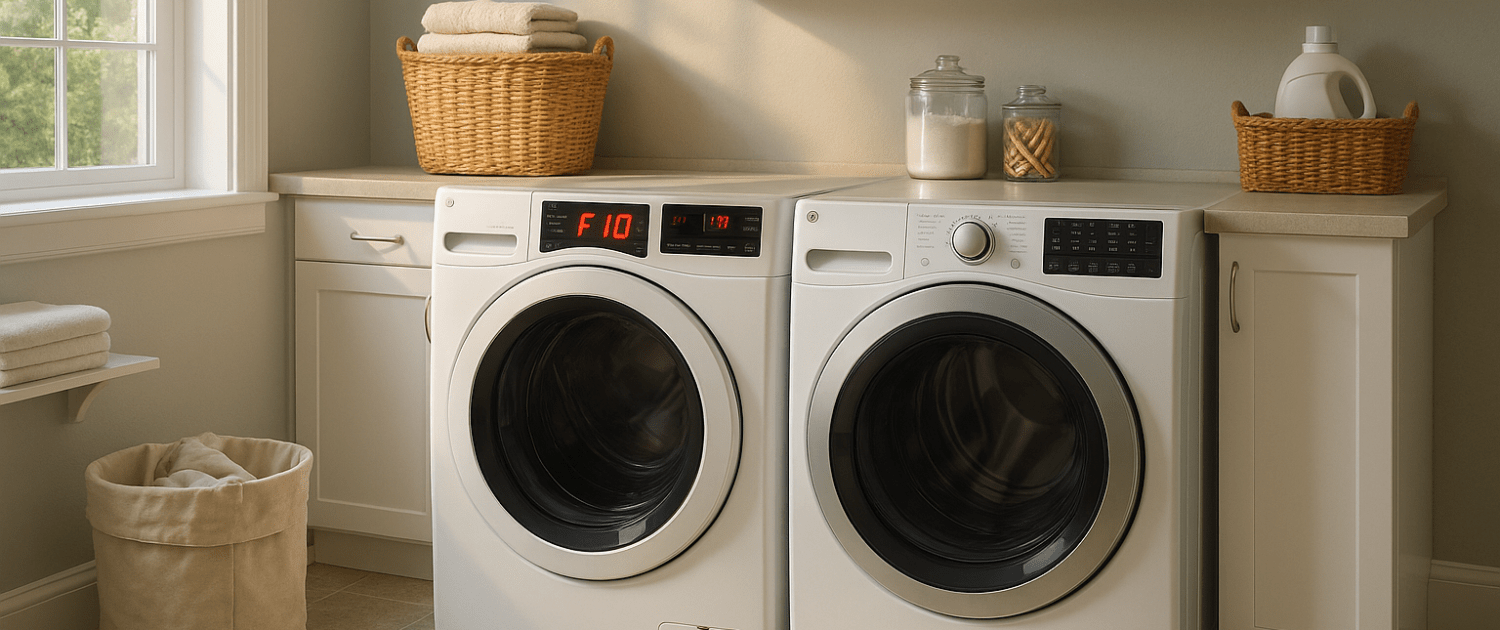
Is your Whirlpool washer displaying an F10 error code? Having washer issues and unsure how to troubleshoot this error? If your display is flashing the F10 Whirlpool washer error code, this comprehensive troubleshooting guide will walk you through how to diagnose and resolve the problem like a pro.
If you find out that you need any replacement parts for your appliance while you’re troubleshooting, you can enter your model number at AppliancePartsPros.com to order them. Most orders arrive in just two business days, and we have thousands of free guides to show you how to install your new parts.
We recommend consulting your manufacturer’s documentation or contact us with any questions.

What does the error code mean?
The F10 error code indicates that the Motor Control Unit (MCU) heat sink in your Whirlpool washing machine has reached its high-temperature shutoff point. This triggers the thermal protector on the MCU heat sink to open, which shuts down all motor functions and displays the F10 code.
This Whirlpool washer error most commonly occurs due to improper ventilation, restricted airflow around the MCU, or a malfunctioning component causing the heat sink to overheat. The F10 code serves as a protective measure to avoid damage to the motor control unit.
What causes the error?
Now that what it means has been established, let’s look at what causes this problem in the first place:
- Poor ventilation – Lack of cool air flow over the MCU is the most common trigger for high heat error.
- Installation issues – Positioning in a confined space with limited airflow can lead to overheating.
- Obstructed vents/circulation – Blockages around vents or MCU boxes restrict cooling.
- Damaged wiring – Frayed/loose wires disrupt communication and can cause overheating of components.
- Seized pulley or shaft – Jammed components cause the MCU to overwork leading to excess heat.
- Defective motor – A malfunctioning drive motor can overburden MCU and its heat sink.
- Bad MCU – Failed/malfunctioning MCU itself can falsely trigger an F10 error.
Safety precautions
When working on any appliance, remember to keep safety first. Here are some tips to keep in mind:
- Always power off and unplug your appliance or switch off the circuit breaker before attempting any maintenance or replacement work. This keeps you safe by preventing any risk of injury from electric shock.
- Wear insulated work gloves to protect your hands from sharp metal parts, pinching hazards and debris.
- Take your time and don’t rush while working to prevent accidents and personal injuries.
- Work in a well-lit area so you can clearly see and access the interior parts.
- Clear your workspace of clutter and other obstacles. Keep children and pets away from the work area.
- Never work on internal parts with bare wet hands. Make sure the work area is completely dry.
- Check your user manual to see if there are specific installation or safety instructions for your part or appliance.
- Be gentle when handling or removing parts. Excessive force might damage the appliance or cause injury.
- Wear safety glasses when working with chemicals, dust or cleaning large debris to prevent injury.
- If the appliance has recently been used, give it plenty of time for any heating parts to cool down before working on it.
- Take pictures or make a note of wiring terminals or other connections before disconnecting to prevent any problems with reassembly.
- When working with wires, avoid touching any exposed wires or terminals. If you need to touch a wire, use a non-conductive tool or wear insulating gloves to prevent electrical shock.
Troubleshooting steps
A bit of easy troubleshooting as outlined in this guide should get your washer working again. Being aware of the common causes along with the proper steps to repair it will help get the unit up and running in no time.
Step 1: Check installation and ventilation
The first step in troubleshooting the F10 error is to thoroughly check the installation of your Whirlpool washing machine. Improper installation that restricts airflow is the most common cause of overheating issues that trigger the F10 code.
Here is how to check for installation and ventilation problems:
- Check that your washer has proper clearance space around the sides and back:
- Sides – At least 1-inch clearance
- Back – At least 3 inches of clearance
- Top – At least 3 inches of clearance
- Verify that your washing machine is not pushed tightly against a wall or tucked into an enclosed area. This can restrict airflow.
- Make sure your washer is level: Improper leveling can cause vibration and noise that can lead to problems. Verify the unit is properly leveled; adjust the leveling feet as needed.
- Check for obstructions to air circulation around vents or the MCU box. Remove any debris or blockages. You can remove any obstructions in the ventilations with a vacuum or long brush that can be purchased by clicking here.
If your Whirlpool washer F10 issue started after installing in a tight space, relocating the unit to allow for better airflow around the MCU will often resolve the problem quickly.
Step 2: Inspect all connections
After ensuring proper installation and ventilation, next inspect all wiring connections related to the motor control unit. Loose or damaged wires can disrupt communication between components and cause overheating issues.
When checking connections, be sure to unplug the washing machine for safety. Then check the wire harness connections at the following points:
- From the MCU to the drive motor
- From the MCU to the Central Control Unit (CCU)
Look for any loose plugs, damaged/frayed wires, or wires that have worked loose from wire harnesses. Make any needed repairs. Also, check that the electrical outlet powering the washer is working correctly.
Step 3: Check the drive system
If you’ve verified the installation and wiring are not causing the Whirlpool F10 error, next inspect the drive system for any issues that could lead to overheating of the MCU.
Carefully check the following drive system components:
- Drive belt – Examine for any damage or signs of wearing. Replace if needed.
- Pulleys and shafts – Test that the pulleys and shafts spin smoothly. Replace any that are seized or damaged.
- Drive motor – Disconnect wires and test the motor windings with a multimeter. If defective, replace the drive motor.
Step 4: Test components
If all else checks out, the next step is to test the washer components related to the F10 error code:
- Verify the MCU is functioning properly and replace it if any issues are found.
- Test the drive motor with a multimeter and replace it if defective. To check the drive motor windings, first disconnect the wire harness connector from the motor. Then use a multimeter to measure the resistance between the following motor connector test points:
- Pin 1 to Pin 2 – Normal reading is approximately 6 ohms
- Pin 2 to Pin 3 – Normal reading is approximately 6 ohms
- Pin 1 to Pin 3 – Normal reading is approximately 6 ohms
- If the resistance readings between the motor connector pins deviate significantly from 6 ohms, it likely indicates a problem with the motor windings. Readings of infinity or wildly abnormal values point to a defective drive motor that requires replacement.
- Check the wire harness for damage and replace if any wires are worn or frayed.
Step 5: Recheck installation and ventilation
After testing all components, it’s a good idea to double-check the installation and ventilation per step 1 again before reassembling the washer.
The F10 error will continue to occur if there is inadequate airflow to prevent overheating of the MCU interior components. Visually inspect vents and circulation paths around the MCU to ensure no obstructions.
Step 6: Reconnect and test
Once fully reassembled, reconnect all wires, hoses, and components properly. It’s crucial that wiring harnesses are securely attached without any pinched or crimped wires.
Review the owner’s manual to ensure you’ve reinstalled all internal components correctly. Then, do a quick test cycle and verify that the MCU is not overheating and you no longer get the F10 error code. Your Whirlpool washer should be back up and running!
Additional information
Thank you for reading! We hope this guide helped you get your washer working again.
If you have any other appliance repair needs or projects, don’t hesitate to explore our other troubleshooting guides and videos.
If you need replacement parts or some extra help with ordering them, grab your model number and head over to AppliancePartsPros.com, where you can chat with a pro, read our DIY blog and more.
Don’t forget to subscribe to us on YouTube and follow us on Facebook, Twitter and Instagram!
The information in this article may not apply to your specific appliance model.
- Disconnect power before you start — unplug it or switch off the breaker, and confirm it’s dead.
- Follow your local electrical code.
- Anything involving household wiring, outlets, or the breaker panel itself is licensed-electrician territory.
 https://www.appliancepartspros.com/b/wp-content/uploads/2025/05/20250508_1327_Error-Display-in-Laundry_simple_compose_01jtrevwjvemz95tr1y7e3g7fx.png
1024
1536
Steven E
https://www.appliancepartspros.com/b/wp-content/uploads/2020/11/app-logo-std.png
Steven E2025-05-09 06:00:582026-07-14 11:52:14How to Fix the F1E1 Error Code on Your Maytag Dryer
https://www.appliancepartspros.com/b/wp-content/uploads/2025/05/20250508_1327_Error-Display-in-Laundry_simple_compose_01jtrevwjvemz95tr1y7e3g7fx.png
1024
1536
Steven E
https://www.appliancepartspros.com/b/wp-content/uploads/2020/11/app-logo-std.png
Steven E2025-05-09 06:00:582026-07-14 11:52:14How to Fix the F1E1 Error Code on Your Maytag Dryer https://www.appliancepartspros.com/b/wp-content/uploads/2025/05/20250508_1343_Peaceful-Laundry-Glitch_simple_compose_01jtrfss0bfd4bc1q1n58y4q30.png
1024
1536
Steven E
https://www.appliancepartspros.com/b/wp-content/uploads/2020/11/app-logo-std.png
Steven E2025-05-09 05:56:012026-07-14 11:52:18Getting Error F3E1 On Your Maytag Dryer? Here’s What to Do
https://www.appliancepartspros.com/b/wp-content/uploads/2025/05/20250508_1343_Peaceful-Laundry-Glitch_simple_compose_01jtrfss0bfd4bc1q1n58y4q30.png
1024
1536
Steven E
https://www.appliancepartspros.com/b/wp-content/uploads/2020/11/app-logo-std.png
Steven E2025-05-09 05:56:012026-07-14 11:52:18Getting Error F3E1 On Your Maytag Dryer? Here’s What to Do https://www.appliancepartspros.com/b/wp-content/uploads/2025/05/20250508_1404_Microwave-Error-Code_simple_compose_01jtrgzj2nf0v9q5tg9fzgkhfn.png
1024
1536
Steven E
https://www.appliancepartspros.com/b/wp-content/uploads/2020/11/app-logo-std.png
Steven E2025-05-09 05:53:072026-07-14 11:52:28How to Fix a Whirlpool Microwave with Error Code F3T2
https://www.appliancepartspros.com/b/wp-content/uploads/2025/05/20250508_1404_Microwave-Error-Code_simple_compose_01jtrgzj2nf0v9q5tg9fzgkhfn.png
1024
1536
Steven E
https://www.appliancepartspros.com/b/wp-content/uploads/2020/11/app-logo-std.png
Steven E2025-05-09 05:53:072026-07-14 11:52:28How to Fix a Whirlpool Microwave with Error Code F3T2With nearly a decade of experience in providing top-notch customer service regarding appliance parts and repair, Steven enjoys sharing practical advice, troubleshooting tips, and interesting information to help readers stay informed.