How to replace Samsung front-load washer spider arm assembly DC97-16509C
Steven E / Friday February 2, 2024
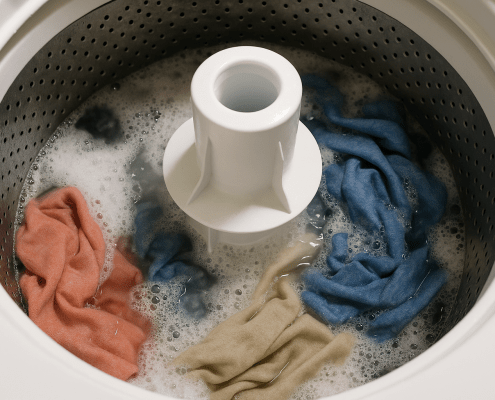
Is your Samsung front-load washer making more noise than laundry day itself? If it’s vibrating or moving around during a wash, the drum shaft assembly may be the culprit. But don’t worry—our step-by-step guide, complete with a how-to video, will walk you through replacing this essential part and bringing peace back to your laundry room.
If your front-load Samsung washer is loud, vibrating or experiencing other movement issues while washing, you may need to replace the drum shaft assembly. This part, which is also called a spider arm assembly, supports the inner wash tub and transfers power from the motor. If it breaks, you’ll need to swap it out with a new one.
You can find a replacement drum shaft assembly DC97-16509C here. If you need other replacement parts for your washer or a different spider arm assembly, just enter your model number at AppliancePartsPros.com to find what you’re looking for.

This replacement process is very involved and may take around an hour to complete. Watch the full repair here for more details on removing and installing parts.
Let’s get your washer in stable shape again!
What is the drum shaft assembly?
The drum shaft assembly is mounted on the back of the wash tub and has a few arms that radiate out from a central hub. When the motor turns, the spider arm rotates the inner tub. With constant vibration and stress over time, the arm can crack and break away from the tub.
What you need
- Plastic mallet
- Phillips and flat-blade screwdrivers
- Small flat screwdriver
- Pliers and side cutters
- Zip tie
- Penetrating oil
- Heat gun
- Socket wrench with extensions
- 19mm, 13mm, and 10mm socket heads
- New drum shaft assembly (make sure it’s compatible with your model)
Keep safety first
When working on any appliance, always keep safety first to avoid personal injury or damage to the appliance or parts. Here are some safety tips to keep in mind:
- Always power off and unplug your washer or switch off the circuit breaker before you attempt any maintenance or replacement work. This keeps you safe by preventing any risk of electric shock.
- Turn off the water supply at the outlet before beginning repairs. Keep towels ready to catch any residual water in the system when removing parts.
- If possible, get someone to help you with some of the steps, like tilting the washer back and lifting out the heavy inner tub assembly. An extra set of hands makes a big difference!
- Take your time while working to prevent accidents and personal injuries. Rushing is the enemy of precision.
- Work in a well-lit area so you can clearly see and access washer parts.
- Keep your workspace free of clutter and other obstacles. Keep children and pets away from the work area.
- Never work on internal parts with wet hands. Make sure the work area is completely dry.
- Check the user manual to see if there are specific installation or safety instructions related to your washer or replacement part.
- Be gentle when handling or removing parts. Excessive force might damage the washer or cause personal injury.
- Wear insulated work gloves to protect your hands from sharp metal parts and debris.
- When working with wires, avoid touching any exposed wires or terminals. If you need to touch a wire, use a non-conductive tool or wear insulating gloves to prevent electrical shock.
- Don’t test live voltage with a multimeter if you’re unfamiliar with how to prevent short-circuiting.
- Consider wearing safety glasses and/or a dust mask when working with chemicals, dust or a large amount of debris to prevent irritation or injury.

Replacement steps
Step 1 – Remove the top panel
- Make sure the washer is unplugged and the water supply is turned off.
- Use a Phillips screwdriver to remove the two screws securing the top panel at the back of the washer.
- Slide the top panel back slightly, then lift it off to remove.
Step 2 – Dismantle the front assembly
- Open the washer door.
- Peel up the door boot seal (outer boot) from the front lip of the washer. Use a flat-blade screwdriver to pry off the spring clamp that holds the boot in place.
- Tuck the boot seal inside the washer to keep it out of the way.
- Use a Phillips screwdriver to remove the three screws holding the door switch assembly.
- Pull out the dispenser drawer and press the tab to completely remove it.
- Remove the three screws securing the dispenser housing and slide it back.
- Free the two hoses from the dispenser housing.
- Start from a corner and work your way around to remove the control panel. Disconnect any plugs by pressing the locking tabs.
Step 3 – Access the interior
- Slide the dispenser housing back and place it down out of the way.
- Open the drain filter door using a flat-blade screwdriver. Pull out the small drain hose from its clamp.
- Use a flat-blade screwdriver to release the housing clips, then remove the housing.
- Tilt the washer back and remove the bottom three screws from the front panel.
- Sit the washer back down and remove the screws at the top of the front panel.
- Rotate the front panel forward at the top and lift it up, then set it to the side.
Step 4 – Remove the tub and counterweights
- With the washer supported, use a 13mm socket wrench to remove the upper and lower counterweights. Hold on to the counterweights as you remove them to prevent them from falling.
- Remove the two Phillips screws holding the rear access panel and remove the panel by sliding it down and out.
- Use a 19mm socket wrench to remove the bolt securing the rotor.
- Gently pull the rotor off, being mindful of the sharp edges and magnets.
- Remove the stator by unscrewing the six 10mm bolts. Disconnect any plugs connected to the stator.
Step 5 – Remove the tub from the cabinet
- Detach any remaining hoses, electrical connectors, and ground wires from the tub.
- Remove the shock absorbers by unscrewing them with a 13mm socket wrench.
- Carefully lift the tub out of the cabinet. You may need the assistance of another person to do this.
Step 6 – Remove the spider arm
- Lay the tub down to access the bolts that join the front and rear outer shells.
- Use a 10mm socket wrench to remove all the bolts around the perimeter of the tub that secure the two halves together.
- Once the tub is separated, find the spider arm attached to the back of the drum.
- See if the bolts holding the spider arm are seized from corrosion. If needed, apply penetrating oil to each bolt to help loosen them.
- Use a heat gun to apply heat to each bolt. This process can take a couple of minutes per bolt to loosen them.
- Use a 10mm socket wrench to attempt to unscrew each bolt. If a bolt won’t budge, you may need to apply additional heat or penetrating oil. In some cases, bolts may break, and if so, you will need to replace them with new ones.
- Once all bolts are removed or broken off, carefully remove the old spider arm from the drum.
Step 7 – Install the new spider arm
- Clean the area where the new spider arm will be mounted. Remove any rust, debris, or residue so there’s a clean, flat surface for the new arm.
- Position the new spider arm onto the back of the drum by aligning the bolt holes on the arm with those on the drum.
- Insert one new bolt into each arm branch to temporarily hold the spider arm in place. Hand-tighten these bolts so the arm is properly aligned. Then install the rest of the bolts.
- Use the 10mm socket wrench to fully tighten the bolts. Tighten them evenly but avoid over-tightening to prevent damaging the bolts or the drum.
- Realign the front and rear halves of the outer tub. Make sure all the guide pins and slots are correctly aligned before securing the halves together.
- Reinstall all the 10mm bolts around the perimeter of the tub. Tighten them securely so the tub is sealed and won’t leak.
Step 8 – Reassemble the washer
- Carefully lift the tub assembly and position it back inside the washer cabinet. You may need the assistance of another person to handle the weight of the tub.
- Reconnect the suspension springs to support the tub. Insert the springs into their respective brackets on the tub and the cabinet and make sure they’re securely in place.
- Reattach any shock absorbers or counterweights that you removed during the disassembly process. Secure them with the appropriate bolts and check that they’re snug once in place.
- Reconnect all the hoses (drain, water inlet, etc.) to their respective ports on the tub and the cabinet and secure them with clamps.
- Reattach the motor to the back of the tub.
- Reconnect all electrical connectors, including those for the motor, sensors, and control panel. Check that each connector is tightly fastened and in the right position.
Step 9 – Reinstall the front and top panels
- If you removed the front panel, reattach it by aligning it with the cabinet and securing it with screws at the top and bottom.
- Make sure the door lock assembly and the detergent dispenser are correctly positioned and secured.
- Place the top panel back onto the cabinet and make sure it aligns with the front and sides.
- Secure the top panel with the screws you removed during disassembly.
Step 10 – Test the washer
- Remove all the tools and materials you used from the work area.
- Check that all the panels are securely fastened and that the washer is stable on the ground.
- Plug the washer back into the electrical outlet and turn on the water supply.
- Check for any signs of leaks around the hoses and connections.
- Select a short wash cycle and start the washer without any laundry to see if it fills, agitates, drains, and spins correctly.
More information
Thanks for reading! We hope this guide helped you replace the spider arm/drum shaft assembly in your Samsung washing machine.
If you still need some replacement parts, grab your model number and head over to AppliancePartsPros.com. We offer over 2 million parts and most orders arrive in 2-3 business days. If you need some help with finding the right part or placing an order, you can contact our team at 1 (877) 477-7278. We can also help you troubleshoot common washer problems here.
While you’re waiting for your new part to arrive, you can explore our DIY blog and watch thousands of video tutorials on our YouTube channel.
Be sure to follow us on Facebook, Twitter, and Instagram to see our latest repair guides!
 https://www.appliancepartspros.com/b/wp-content/uploads/2025/06/20250616_1305_Washing-Machine-Interior_simple_compose_01jxwv53n1etqrf8x47qfgvke4.png
1024
1536
Steven E
https://www.appliancepartspros.com/b/wp-content/uploads/2020/11/app-logo-std.png
Steven E2025-06-17 06:39:292025-06-17 06:39:38Whirlpool Top Load Washer Not Draining? Test the Drain Pump
https://www.appliancepartspros.com/b/wp-content/uploads/2025/06/20250616_1305_Washing-Machine-Interior_simple_compose_01jxwv53n1etqrf8x47qfgvke4.png
1024
1536
Steven E
https://www.appliancepartspros.com/b/wp-content/uploads/2020/11/app-logo-std.png
Steven E2025-06-17 06:39:292025-06-17 06:39:38Whirlpool Top Load Washer Not Draining? Test the Drain Pump https://www.appliancepartspros.com/b/wp-content/uploads/2025/06/20250529_1128_Modern-Laundry-Room_simple_compose_01jwead3vzftvb0c2g7p0cfrj5.png
1024
1536
Steven E
https://www.appliancepartspros.com/b/wp-content/uploads/2020/11/app-logo-std.png
Steven E2025-06-17 06:33:582025-06-17 06:34:07tE Error Code and Long Wash Time in LG Washer? How to Fix It
https://www.appliancepartspros.com/b/wp-content/uploads/2025/06/20250529_1128_Modern-Laundry-Room_simple_compose_01jwead3vzftvb0c2g7p0cfrj5.png
1024
1536
Steven E
https://www.appliancepartspros.com/b/wp-content/uploads/2020/11/app-logo-std.png
Steven E2025-06-17 06:33:582025-06-17 06:34:07tE Error Code and Long Wash Time in LG Washer? How to Fix It https://www.appliancepartspros.com/b/wp-content/uploads/2025/06/20250605_1526_Colonial-Laundry-Room-Elegance_simple_compose_01jx0rsqejfevr2qv3vwdna1hn.png
1024
1536
Steven E
https://www.appliancepartspros.com/b/wp-content/uploads/2020/11/app-logo-std.png
Steven E2025-06-17 06:27:352025-06-17 06:27:44How to Test and Replace an LG Washer Heater with Thermistor
https://www.appliancepartspros.com/b/wp-content/uploads/2025/06/20250605_1526_Colonial-Laundry-Room-Elegance_simple_compose_01jx0rsqejfevr2qv3vwdna1hn.png
1024
1536
Steven E
https://www.appliancepartspros.com/b/wp-content/uploads/2020/11/app-logo-std.png
Steven E2025-06-17 06:27:352025-06-17 06:27:44How to Test and Replace an LG Washer Heater with ThermistorWith nearly a decade of experience in providing top-notch customer service regarding appliance parts and repair, Steven enjoys sharing practical advice, troubleshooting tips, and interesting information to help readers stay informed.