How to replace Whirlpool fridge water reservoir W11168758
Steven E / Tuesday February 27, 2024
Struggling with a leaky refrigerator or a strange taste in your ice? Your Whirlpool fridge’s water reservoir might be the culprit. Fortunately, replacing it is simpler than you think—watch our step-by-step how-to video below to learn how to fix it yourself.
In a Whirlpool refrigerator, the water reservoir is responsible for storing and supplying water, which helps your refrigerator dispense chilled water and produce ice.
If you notice leaks from the reservoir, reduced or no water dispensing or an unusual taste or odor in the water or ice, you may need a new water reservoir.
You can find a replacement water reservoir here. If you need other replacement parts for your Whirlpool refrigerator, just enter your model number at AppliancePartsPros.com to find them. It’s that easy! Most orders arrive in just two business days, and we have thousands of guides to show you how to install your new parts.

Let’s unpack the process for replacing the water reservoir in a Whirlpool fridge!
Watch here: How To Replace: Whirlpool/KitchenAid/Maytag Refrigerator Water Reservoir W11168758
What you’ll need
- 1/4-inch nut driver
- Flathead screwdriver
- 1/2-inch wrench
- Scissors or cutter
- Towels
- Zip ties
- Replacement water reservoir (make sure it’s compatible with your model)
Read more: How To Find Your Appliance’s Model Number

Safety precautions
When working on any appliance, remember to keep safety first. Here are some tips to keep in mind:
- Always power off and unplug your appliance or switch off the circuit breaker before you attempt any maintenance or replacement work. This keeps you safe by preventing any risk of electric shock.
- Turn off the water supply at the outlet before beginning repairs. Keep towels ready to catch any residual water in the system when removing parts.
- If the appliance has recently been used, give it plenty of time to cool down before working on it.
- Take your time while working to prevent accidents and personal injuries. Rushing is the enemy of precision.
- Work in a well-lit area so you can clearly see and access appliance parts.
- Keep your workspace free of clutter and other obstacles. Keep children and pets away from the work area.
- Never work on internal parts with wet hands. Make sure the work area is completely dry.
- Check the user manual to see if there are specific installation or safety instructions related to your appliance or replacement part.
- Be gentle when handling or removing parts. Excessive force might damage the appliance or cause personal injury.
- Wear insulated work gloves to protect your hands from sharp metal parts and debris.
- When working with wires, avoid touching any exposed wires or terminals. If you need to touch a wire, use a non-conductive tool or wear insulating gloves to prevent electrical shock.
- Consider wearing safety glasses and/or a dust mask when working with chemicals, dust or a large amount of debris to prevent irritation or injury.
Read more: Top 5 Tips for Troubleshooting Appliance Problems
Replacement steps
Step 1: Disassemble the fridge
- Turn the fridge off and disconnect it from the power supply.
- Turn off the water supply at the outlet.
- Open both French doors of the refrigerator.
- Remove the glass shelves by lifting up the front of each one, disengaging the back hooks, and then lifting each one out.
- Find the water reservoir inside the compartment that’s covered by a panel on the right side of the fresh food section, in the ceiling.
- Press on the filter cover to release and open it.
- Remove the water filter by turning it counterclockwise. Be prepared for some water to come out, so have a towel handy to catch any spills.
- Use the quarter-inch nut driver to remove the two screws holding the panel in place.
- Pull down the panel and disconnect the LED connector by pushing on the plugin tab and pulling it apart.
- Use the flat-blade screwdriver to pry off the bracket by sliding it into the designated cutout.
- Disconnect the water lines by using the half-inch wrench to press down on the locking collar of the water filter housing. Disconnect the tubes by pulling them out.
- Snip off the three zip ties using scissors or cutters.
- Place the wrench on the locking collar of the water valve and push it in while simultaneously pulling out on the old water reservoir to disconnect it. It may contain water, so keep a towel underneath to prevent spills.
- Remove the old water reservoir.
- Use the 1/4-inch nut driver to remove three 1/4-inch screws.
- Use the flat-blade screwdriver to release the three clips holding the reservoir in place. Position the screwdriver on the top of each clip, then push down to disengage them.
Step 2: Reassemble the washer
- Secure the reservoir in place with two new zip ties by inserting the right-side zip tie into the opening, pulling it through, and locking it on the first couple of locks. Leave the second zip tie hanging without locking it.
- Slide the new water reservoir into the zip tie and position it properly. Insert the side into the opening of the water inlet valve and press it in.
- Insert the tube into the water filter housing port and push it in all the way.
- Tighten the zip ties to secure the reservoir in place.
- Cut off any excess length from the zip ties with the side cutters.
- Install the support bracket by sliding it on and pushing it up.
- Use the 1/4-inch nut driver to secure the bracket with three 1/4-inch screws.
- Connect the LED plug and install the cover panel. Interlock the three hooks on the panel with the three openings on the back of the upper bracket. Slide the panel in, bring it up, and press it firmly.
- Use the 1/4-inch nut driver to secure the panel with the 1/4-inch screws.
- Position the water filter with the arrow pointing up and align the plastic dot with the corresponding cutout.
- Push the filter in and turn it clockwise approximately 90 degrees.
- Close the compartment containing the water filter.
- Install the glass shelves by placing them in the rear hooks and lowering them down.
- Close both doors of the refrigerator.
- Plug in the fridge and turn on the water supply.
Read more: 5 Common Mistakes That Shorten The Lifespan Of Appliances
Additional information
Thanks for reading! We hope this guide helped you replace the water reservoir on your Whirlpool refrigerator.
If you still need some replacement parts, grab your model number and head over to AppliancePartsPros.com. We offer over two million parts and most orders arrive in two business days. If you need some help with finding the right part or placing an order, you can contact our team at 1 (877) 477-7278. We can also help you troubleshoot common fridge problems here.
While you’re waiting for your new part to arrive, you can explore our DIY blog and watch thousands of video tutorials on our YouTube channel.
Be sure to follow us on Facebook, Twitter and Instagram to see our latest repair guides!
 https://www.appliancepartspros.com/b/wp-content/uploads/2025/06/20250618_1147_Refrigerator-Air-Ducts_simple_compose_01jy1vhs1ee0ss9k8d258eehzm.png
1024
1536
Steven E
https://www.appliancepartspros.com/b/wp-content/uploads/2020/11/app-logo-std.png
Steven E2025-06-19 06:20:382025-08-20 10:53:32Whirlpool Refrigerator Air Duct WP2316186 Replacement Guide
https://www.appliancepartspros.com/b/wp-content/uploads/2025/06/20250618_1147_Refrigerator-Air-Ducts_simple_compose_01jy1vhs1ee0ss9k8d258eehzm.png
1024
1536
Steven E
https://www.appliancepartspros.com/b/wp-content/uploads/2020/11/app-logo-std.png
Steven E2025-06-19 06:20:382025-08-20 10:53:32Whirlpool Refrigerator Air Duct WP2316186 Replacement Guide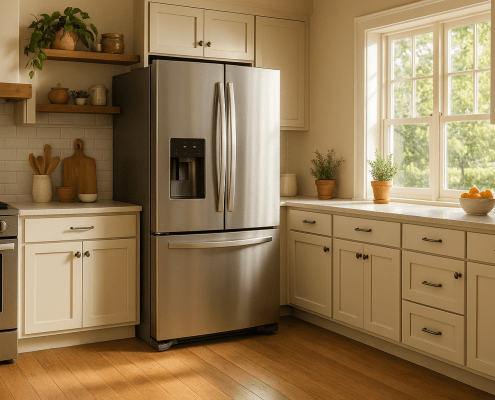 https://www.appliancepartspros.com/b/wp-content/uploads/2025/06/20250523_1507_Spacious-Kitchen-with-Refrigerator_simple_compose_01jvz8k873e1rbvmbfpse1e7dn.png
1024
1536
Steven E
https://www.appliancepartspros.com/b/wp-content/uploads/2020/11/app-logo-std.png
Steven E2025-06-19 06:11:212025-08-20 10:39:40Easily Replace Drawer Handle DA63-04275B on a Samsung Fridge
https://www.appliancepartspros.com/b/wp-content/uploads/2025/06/20250523_1507_Spacious-Kitchen-with-Refrigerator_simple_compose_01jvz8k873e1rbvmbfpse1e7dn.png
1024
1536
Steven E
https://www.appliancepartspros.com/b/wp-content/uploads/2020/11/app-logo-std.png
Steven E2025-06-19 06:11:212025-08-20 10:39:40Easily Replace Drawer Handle DA63-04275B on a Samsung Fridge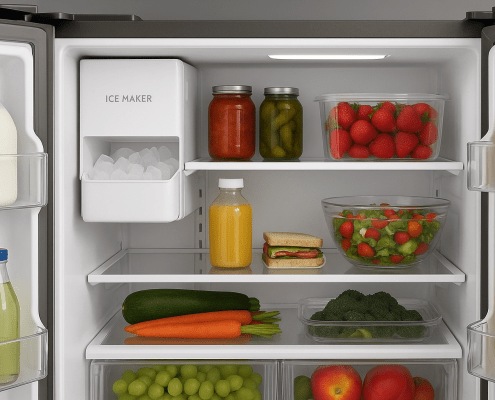 https://www.appliancepartspros.com/b/wp-content/uploads/2025/06/20250617_1527_Refrigerators-Ice-Maker_simple_compose_01jxznp0v7fvctbmy7qy4pvd68.png
1024
1536
Steven E
https://www.appliancepartspros.com/b/wp-content/uploads/2020/11/app-logo-std.png
Steven E2025-06-19 06:03:112025-08-20 10:15:33LG Fridge Icemaker Cooling Fan 5209JA1044A DIY Replacement
https://www.appliancepartspros.com/b/wp-content/uploads/2025/06/20250617_1527_Refrigerators-Ice-Maker_simple_compose_01jxznp0v7fvctbmy7qy4pvd68.png
1024
1536
Steven E
https://www.appliancepartspros.com/b/wp-content/uploads/2020/11/app-logo-std.png
Steven E2025-06-19 06:03:112025-08-20 10:15:33LG Fridge Icemaker Cooling Fan 5209JA1044A DIY ReplacementWith nearly a decade of experience in providing top-notch customer service regarding appliance parts and repair, Steven enjoys sharing practical advice, troubleshooting tips, and interesting information to help readers stay informed.