Pro tips for replacing Whirlpool / Maytag / KitchenAid washer lid assembly W11101059
Steven E / Thursday June 20, 2024
Is your washer lid cracked, refusing to latch, or stuck on squeaky hinges? Don’t worry, there’s no need to call in a technician just yet. With a little guidance from our step-by-step video tutorial, you’ll be able to replace the lid assembly on your Whirlpool, Maytag, or KitchenAid washer and get your laundry routine back on track in no time! Check out our detailed how-to video below and start your DIY repair journey today.
Looking for the right part? Enter your appliance model number below to find the exact match and get your appliance running like new again!

Are you dealing with a cracked or damaged lid on your top-load Whirlpool, Maytag or KitchenAid washer? Maybe your lid latch isn’t working as it should, or the hinges have finally given up due to regular wear and tear.

The good news is that you don’t need to be a technician to replace this part. Let’s walk through the steps together so you can get back to your laundry routine.
You can find a replacement lid assembly here. If you need other replacement parts for your washer, just enter your model number at AppliancePartsPros.com to find them. It’s that easy! Most orders arrive in just two business days, and we have thousands of guides to show you how to install your new parts.
Why would I need to replace a washer lid assembly?
There are several reasons why you may need to switch out the lid assembly in your washing machine. Here are a few:
Cracked or broken lid
Over time and depending on the kind of environment it’s in, the lid of your washing machine may become brittle and crack, particularly around the hinge area. This not only affects the aesthetics but, more importantly, the safety of the machine.
Damaged or missing latch
If the lid latch is damaged or, worse, has snapped off completely, the lid won’t stay closed during the wash cycle and may prevent the washer from running at all. It can also lead to leaks and potential damage to the machine or your laundry room.
Worn out hinges
Hinges, like all other appliance parts, can wear out or even break over long periods of regular use. When this happens, the lid won’t open or close smoothly.
Read more: Why It’s Best to Choose OEM Over Aftermarket Parts for Appliance Repairs
What you need
- Replacement lid assembly (make sure it’s compatible with your specific washer model before installing)
- Torx 15 screwdriver
- Flathead screwdriver
Important: The specific tools required may vary depending on the model of your appliance and the type of fasteners used on it. Always consult the user manual or refer to any specific instructions provided by the manufacturer for the recommended tools for your appliance model.
Read more: My part is no longer available! What do I do now?
Safety precautions
When working on any appliance, remember to keep safety first. Here are some tips to keep in mind:
- Always power off and unplug your appliance or switch off the circuit breaker before you attempt any maintenance or replacement work. This keeps you safe by eliminating any risk of electric shock.
- If the appliance has recently been used, give it plenty of time to cool down before working on it.
- Turn off the water supply at the outlet before beginning repairs. Keep towels ready to catch any residual water in the system when removing parts.
- Take your time while working to prevent accidents and personal injuries. Rushing is the enemy of precision.
- Work in a well-lit area so you can see and access appliance parts.
- Keep your workspace free of clutter and other obstacles. Keep children and pets away from the work area.
- Never work on internal parts with wet hands. Make sure the work area is completely dry.
- Check the user manual to see if there are specific installation or safety instructions related to your appliance or replacement part.
- Be gentle when handling or removing parts. Excessive force might damage the appliance or cause personal injury.
- Wear insulated work gloves to protect your hands from sharp metal parts and debris.
- When working with wires, avoid touching any exposed wires or terminals. If you need to touch a wire, use a non-conductive tool or wear insulating gloves to prevent electrical shock.
- Always take photos or make a note of wiring terminals or other connections before disconnecting them to make reassembly easier.
How to replace the lid assembly
Follow these steps to replace a faulty lid assembly in your Whirlpool, Maytag or KitchenAid washing machine.
- Unplug the washer from the power outlet and shut off the water supply.
- Open the lid to access the hinge screws.
- Use the Torx T15 screwdriver to remove the four hinge screws – two on each side of the lid. These screws hold the lid in place. If needed, use a flathead screwdriver to pull the screws out.
- Lift the lid to detach it from the washer body. Set the old lid assembly aside.
- Take a moment to thoroughly clean the hinge areas. Use a damp cloth to remove any dirt, debris, or remnants of the old assembly.
- Align the new lid and place it on the washer. Make sure the hinges match up with the hinge areas on the machine.
- Insert the Torx T15 screws into the hinge holes on both sides of the lid. You’ll be using two screws for each side. Tighten them with a screwdriver.
- Open and close the new lid multiple times to make sure it moves and latches smoothly.
- Plug the washing machine back into the electrical outlet and turn the water supply back on.
- Run a test cycle to make sure the new lid assembly is working correctly.
Read more: Tips For Preventing Laundry Damage in Your Washing Machine
Additional information
Thanks for reading! If you have any other appliance repair needs or projects, you can find other resources and our DIY blog at AppliancePartsPros.com. There, you can enter your model number to order the exact parts you need. Most orders arrive in 2-3 business days.
You can also reach our award-winning customer service team at 1-877-477-7278, chat with a pro on our website and watch thousands of free video tutorials on our YouTube channel.
 https://www.appliancepartspros.com/b/wp-content/uploads/2025/06/20250616_1457_Washer-Control-Board_simple_compose_01jxx1kwwney5a7x8b18byw6te.png
1024
1536
Steven E
https://www.appliancepartspros.com/b/wp-content/uploads/2020/11/app-logo-std.png
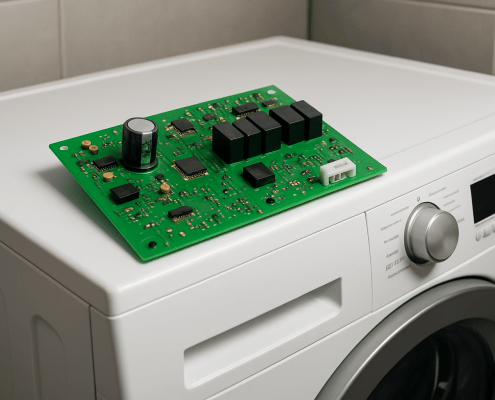
Steven E2025-06-17 06:21:312025-06-17 06:22:04LG Washer Main Control Board Testing and Replacement Guide
https://www.appliancepartspros.com/b/wp-content/uploads/2025/06/20250616_1457_Washer-Control-Board_simple_compose_01jxx1kwwney5a7x8b18byw6te.png
1024
1536
Steven E
https://www.appliancepartspros.com/b/wp-content/uploads/2020/11/app-logo-std.png
Steven E2025-06-17 06:21:312025-06-17 06:22:04LG Washer Main Control Board Testing and Replacement Guide https://www.appliancepartspros.com/b/wp-content/uploads/2025/06/20250605_1526_Colonial-Laundry-Room-Elegance_simple_compose_01jx0rsqege5qvgz9b5546nem4.png
1024
1536
Steven E
https://www.appliancepartspros.com/b/wp-content/uploads/2020/11/app-logo-std.png
Steven E2025-06-17 06:18:122025-06-17 06:18:46LG Front-Load Washer Keeps Filling? How to Fix FE/PE Errors
https://www.appliancepartspros.com/b/wp-content/uploads/2025/06/20250605_1526_Colonial-Laundry-Room-Elegance_simple_compose_01jx0rsqege5qvgz9b5546nem4.png
1024
1536
Steven E
https://www.appliancepartspros.com/b/wp-content/uploads/2020/11/app-logo-std.png
Steven E2025-06-17 06:18:122025-06-17 06:18:46LG Front-Load Washer Keeps Filling? How to Fix FE/PE Errors https://www.appliancepartspros.com/b/wp-content/uploads/2025/06/20250616_1305_Washing-Machine-Interior_simple_compose_01jxwv53n0fasswsrq0xfeygtb.png
1024
1536
Steven E
https://www.appliancepartspros.com/b/wp-content/uploads/2020/11/app-logo-std.png
Steven E2025-06-17 06:16:022025-06-17 06:16:34LG Washer Water Level Pressure Switch Testing and Replacement
https://www.appliancepartspros.com/b/wp-content/uploads/2025/06/20250616_1305_Washing-Machine-Interior_simple_compose_01jxwv53n0fasswsrq0xfeygtb.png
1024
1536
Steven E
https://www.appliancepartspros.com/b/wp-content/uploads/2020/11/app-logo-std.png
Steven E2025-06-17 06:16:022025-06-17 06:16:34LG Washer Water Level Pressure Switch Testing and ReplacementWith nearly a decade of experience in providing top-notch customer service regarding appliance parts and repair, Steven enjoys sharing practical advice, troubleshooting tips, and interesting information to help readers stay informed.