How to replace Bosch dishwasher circulation motor and heater assembly 00753351
Steven E / Monday January 8, 2024
Is your Bosch dishwasher leaving your dishes less than sparkling clean or tripping your circuit breaker mid-cycle? A faulty circulation motor and heater assembly could be the culprit, but fear not—we’ve got you covered with a step-by-step guide for replacing it yourself. Scroll down to watch our detailed how-to video and save yourself the hassle (and cost) of a service call!
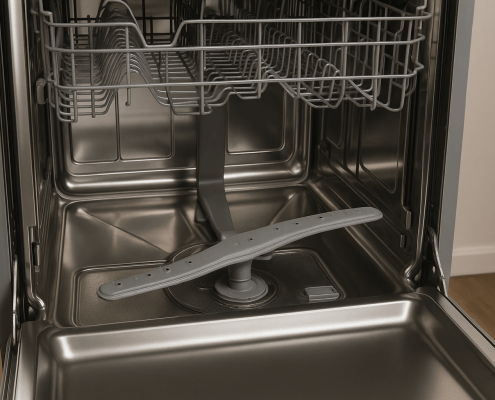
The circulation motor and heater assembly is an integral component in your Bosch dishwasher’s washing system. This part is responsible for circulating water throughout the dishwasher tub and heating the water to the appropriate temperature for cleaning.
If you need to replace circulation motor and heater assembly 00753351, we’re here to help. Let’s walk through some of the reasons why you’d need to get a replacement and how to install it yourself.

If you need assembly 00753351, you can order it here. You can also use your dishwasher’s model number to search for compatible parts at AppliancePartsPros.com.
You got this!
Why you may need to replace the assembly
- The motor is making loud noises or buzzing sounds
- Dishes are not getting fully cleaned or are coming out cold
- You notice leaks coming from the bottom of the dishwasher
- The dishwasher trips your home’s circuit breaker when it runs
Replacing this part requires disassembling a significant portion of the dishwasher frame and components, but doing this yourself can help you save the cost of a service call.

What you need
- 5/8-inch open-end wrench
- 5/16-inch nut driver
- Phillips head screwdriver
- Flathead screwdriver
- Small flathead screwdriver
- T20 Torx screwdriver
- Needle nose pliers
- Replacement circulation motor and heater assembly (part #00753351)
- Towels or buckets for catching water
READ MORE: Leaving Dirty Dishes in the Dishwasher: How Long Can It Wait?
Safety precautions
When working on any appliance, always keep safety first to avoid personal injury or damage to the appliance or parts. Here are some safety tips to keep in mind:
- Always power off and unplug your dishwasher or switch off the circuit breaker before attempting any maintenance or replacement work. This keeps you safe by preventing any risk of electric shock.
- Shut off the water supply to prevent excessive drainage during disassembly.
- If the dishwasher has recently been used, give it plenty of time to cool down before working on it.
- Take your time and don’t rush while working to prevent accidents and personal injuries.
- Work in a well-lit area so you can clearly see and access dishwasher parts.
- Keep your workspace free of clutter and other obstacles. Keep children and pets away from the work area.
- Never work on internal parts with wet hands. Make sure the work area is completely dry.
- Check the user manual to see if there are specific installation or safety instructions related to your dishwasher or replacement part.
- Be gentle when handling or removing parts. Excessive force might damage the dishwasher or cause personal injury.
- Wear insulated work gloves to protect your hands from sharp metal parts and debris.
- When working with wires, avoid touching any exposed wires or terminals. If you need to touch a wire, use a non-conductive tool or wear insulating gloves to prevent electrical shock.
- Consider wearing safety glasses and/or a dust mask when working with chemicals, dust or a large amount of debris to prevent irritation or injury.
Replacement instructions
Step 1 – Prepare the dishwasher
- Unplug the dishwasher to eliminate the risk of electric shock.
- Turn off the water supply.
- Take out both the upper and lower racks to allow access to the inner components.
- Remove the screws connecting the dishwasher to the countertop and cabinet.
- Disconnect the drain and water supply lines.
Step 2 – Disassemble the door and control panel
- Take out the screws from the inner door panel to detach it from the outer door. Lift it off the outer panel.
- Disconnect the door control panel’s touchpad ribbon cable and allow the control panel to hang loosely.
- Use needle nose pliers to detach the door springs from the hinges. Slide off the hinge covers.
- Once unhinged, you can remove the front door and set it aside.
Step 3 – Disassemble the base and sump
- Look for locking tabs on the bottom of the base. Press them in with a flathead screwdriver to release the base.
- Remove all wiring plugs and water supply hoses from the sump and valve assemblies.
- With the base removed, you can access the old circulation motor assembly and detach it from the sump.
Step 4 – Install the new circulation motor
- Use hose clamps to attach the short drain hose and the longer hose to the circulation motor.
- Match the wiring plugs you disconnected earlier to their respective components and firmly press them into place.
- Set the new circulation motor into place and reattach the base and tub components.
READ MORE: Reduce Water Usage In Your Dishwasher
Step 5 – Reassemble the dishwasher
- With all internal components replaced, stand the dishwasher back up and slide it into the cabinet cutout.
- Reconnect the water supply line and drain hose. Tighten the clamps.
- Place the door back on its hinges and reattach the door springs. Replace the control panel ribbon cable.
- Reinstall the outer door panel, access panels, insulation, and racks.
- Slowly turn the water supply back on and check that there are no leaks before fully reinstalling the dishwasher.
- Plug the dishwasher back in and run a test cycle.
More information
Thanks for reading! We hope this article helped you replace the circulation motor and heater assembly in your Bosch dishwasher.
If you still need some replacement parts, grab your model number and head over to AppliancePartsPros.com. We offer over two million parts and most orders arrive in two business days. If you need some help with finding the right part or placing an order, you can contact our team at 1 (877) 477-7278.
While you’re waiting for your new part to arrive, you can explore our DIY blog and watch thousands of video tutorials on our YouTube channel.
Be sure to follow us on Facebook, Twitter, and Instagram to see our latest repair guides!
 https://www.appliancepartspros.com/b/wp-content/uploads/2025/06/20250618_1135_Open-Dishwasher-Interior_simple_compose_01jy1tspt8frxbw1s0kphty34n.png
1024
1536
Steven E
https://www.appliancepartspros.com/b/wp-content/uploads/2020/11/app-logo-std.png
Steven E2025-06-19 06:08:512025-08-20 10:25:45Whirlpool Dishwasher Lower Spray Arm W10803178 Install Guide
https://www.appliancepartspros.com/b/wp-content/uploads/2025/06/20250618_1135_Open-Dishwasher-Interior_simple_compose_01jy1tspt8frxbw1s0kphty34n.png
1024
1536
Steven E
https://www.appliancepartspros.com/b/wp-content/uploads/2020/11/app-logo-std.png
Steven E2025-06-19 06:08:512025-08-20 10:25:45Whirlpool Dishwasher Lower Spray Arm W10803178 Install Guide https://www.appliancepartspros.com/b/wp-content/uploads/2025/06/20250618_1039_Open-Dishwasher-Latch_simple_compose_01jy1qj818fwfaqxpm29d92q0h.png
1024
1536
Steven E
https://www.appliancepartspros.com/b/wp-content/uploads/2020/11/app-logo-std.png
Steven E2025-06-19 05:37:352025-08-20 09:45:30How to Replace Door Latch 8193830 on a Whirlpool Dishwasher
https://www.appliancepartspros.com/b/wp-content/uploads/2025/06/20250618_1039_Open-Dishwasher-Latch_simple_compose_01jy1qj818fwfaqxpm29d92q0h.png
1024
1536
Steven E
https://www.appliancepartspros.com/b/wp-content/uploads/2020/11/app-logo-std.png
Steven E2025-06-19 05:37:352025-08-20 09:45:30How to Replace Door Latch 8193830 on a Whirlpool Dishwasher https://www.appliancepartspros.com/b/wp-content/uploads/2025/06/20250522_0842_Dishwasher-in-Sunlit-Kitchen_simple_compose_01jvw04ekdeqjtrnj7897hae8j.png
1024
1536
Steven E
https://www.appliancepartspros.com/b/wp-content/uploads/2020/11/app-logo-std.png
Steven E2025-06-19 05:22:312025-08-20 08:45:33DIY Install Door Spring WP8270182 on a Whirlpool Dishwasher
https://www.appliancepartspros.com/b/wp-content/uploads/2025/06/20250522_0842_Dishwasher-in-Sunlit-Kitchen_simple_compose_01jvw04ekdeqjtrnj7897hae8j.png
1024
1536
Steven E
https://www.appliancepartspros.com/b/wp-content/uploads/2020/11/app-logo-std.png
Steven E2025-06-19 05:22:312025-08-20 08:45:33DIY Install Door Spring WP8270182 on a Whirlpool DishwasherWith nearly a decade of experience in providing top-notch customer service regarding appliance parts and repair, Steven enjoys sharing practical advice, troubleshooting tips, and interesting information to help readers stay informed.